Zoom Tutorials
- When you see bold content means you can find it on your screen.
- When you see ⚠️ means you need to take attention.
- When you see suffix * means it's very important content.
- for the (departed)⚠️ section, plz refer Chinese version zhumu document.
Zoom DIL(departed)⚠️
Download
Download the Zoom Client for Meetings
Direct Download link for windows : https://zoom.us/client/latest/ZoomInstaller.exe
- Or From Download Page https://zoom.us/download#client_4meetingby click Download button of Zoom Client for Meetings.
Install
Double Click the ZoomInstaller.exe , Keep settings default, or Flow this screenshot

Login
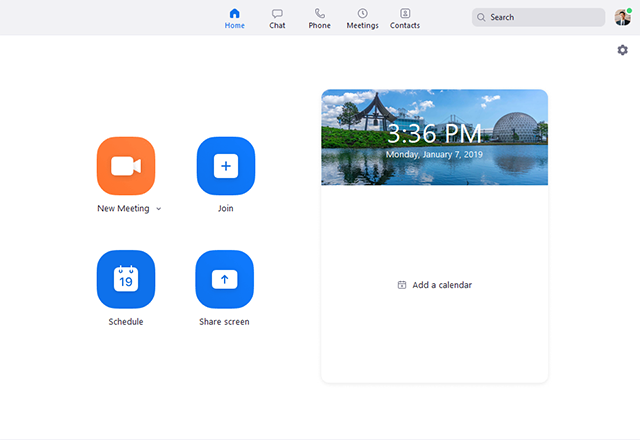
After launching Zoom, click Sign In to login.

After signing in, you will see the Home tab.
Settings(departed)⚠️
PMI(Personal Metting ID)
Click the downwards arrow of New Meeting to make sure Start with video & Use My Personal Meeting ID (PMI) checked.
Show connected time
- Click your profile picture,
- Click Settings,
- Click General tab
- Click Show my connected time
Meeting Controls
Once you clicked New Meeting, you can access the meeting controls located at the bottom of the meeting window (move your mouse in the Zoom window to display meeting controls or click Return to Meeting if you see the button).
New meeting
Start a meeting then wait for your student to join. Click the downwards arrow to make sure you enabled video & choosed PMI.
Start / Pause Recording *
Click Record button to record, click Pause Recording button while recording.
- Click the option to Record.
 ===>
===> 
If there is a menu, select Record on this Computer.
You will see the following recording indicator in the top-left corner while recording is active.

After the meeting has ended, Zoom will convert the recording so you can access the files.

Once the conversion process is complete, the folder containing the recording files will open.
Share whiteboard
Click Share Screen button, then choose whiteboard.
Annotate on Share
@see Share whiteboard
Stop a share
Click the red button "Stop Share". If you can't see this buttons group, hover on the top of zoom window.

Share a pdf
- Open the pdf first,
- Click [Share Screen] button,
- Choose the application that opened the pdf,
- Now the student will see your pdf.
- Then you can draw / text like whiteboard.
Share a mp4 / mp3
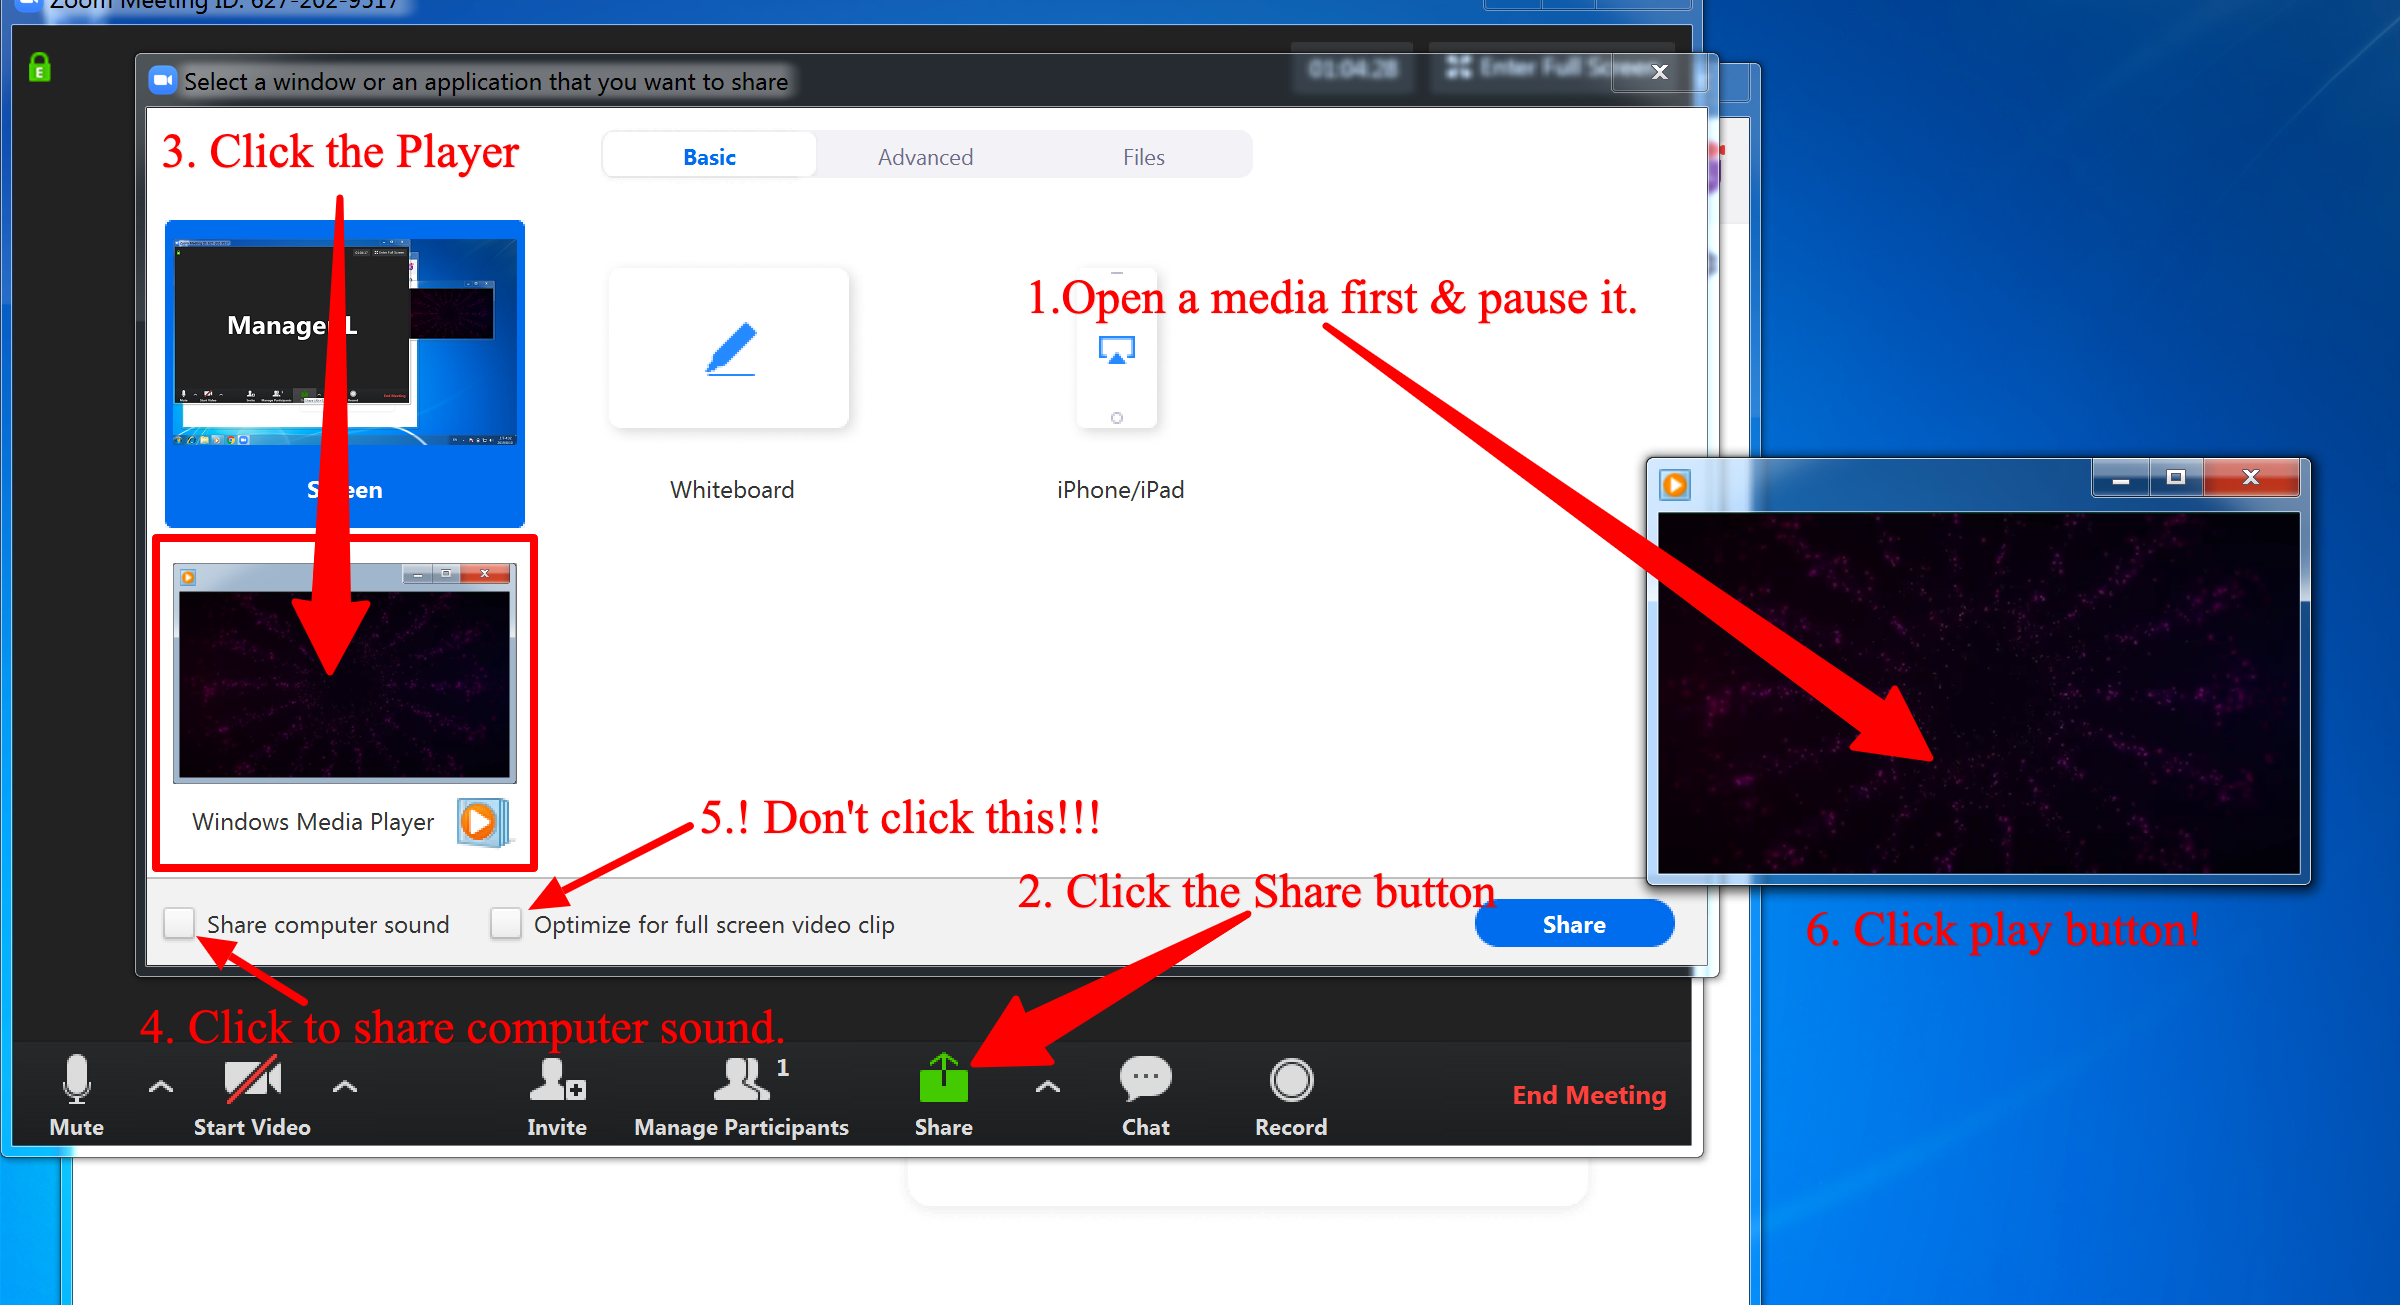
- Open the video/audio first, then pause it.
- Click [Share Screen] button
- Choose the application to share mp4/mp3
- Click the checkbox to Share computer sound **
- unpause your media player.
Choose a Virtual Background
The virtual background feature allows you to display an image as your background during a Zoom Meeting. This feature works best with a green screen and uniform lighting, to allow Zoom to detect the difference between you and your background.
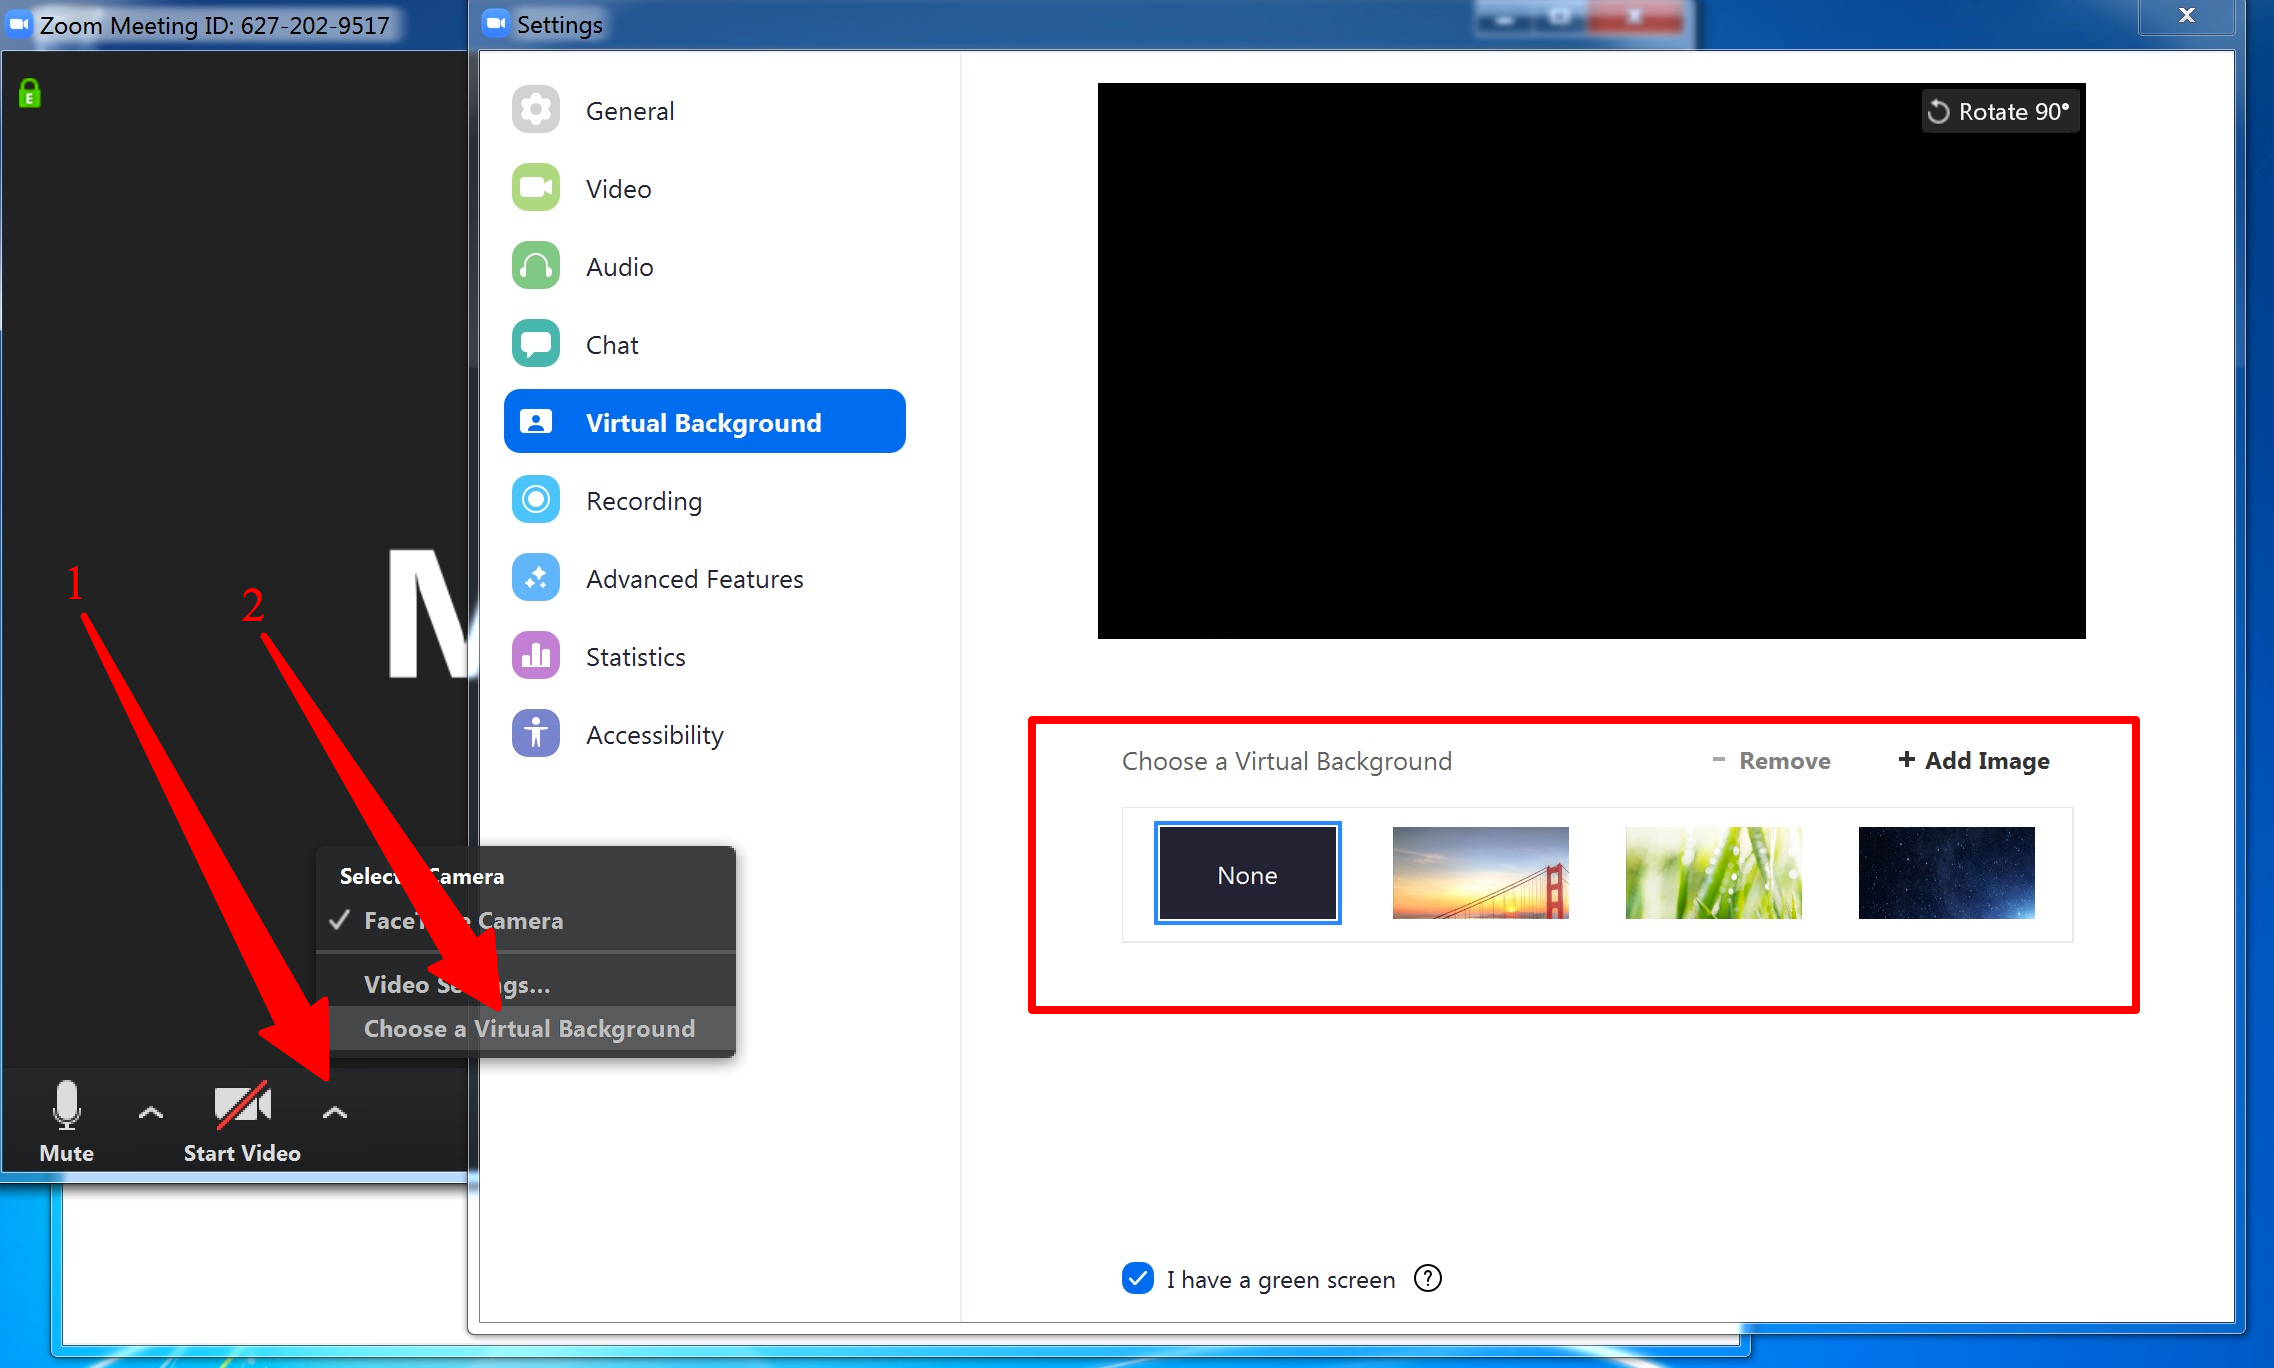
- To achieve the best virtual background effect, Zoom recommends using a solid color background, preferably green. Recommended green screens
- ⚠️If your background isn't tidy, you can use this feature.
- ⚠️If your computer give bad effect, don't use this feature.
Chat
Click Chat button.

Mute / Unmute
Click the Mute button to mute, while in mute state, you can click the Unmute button to unmute.
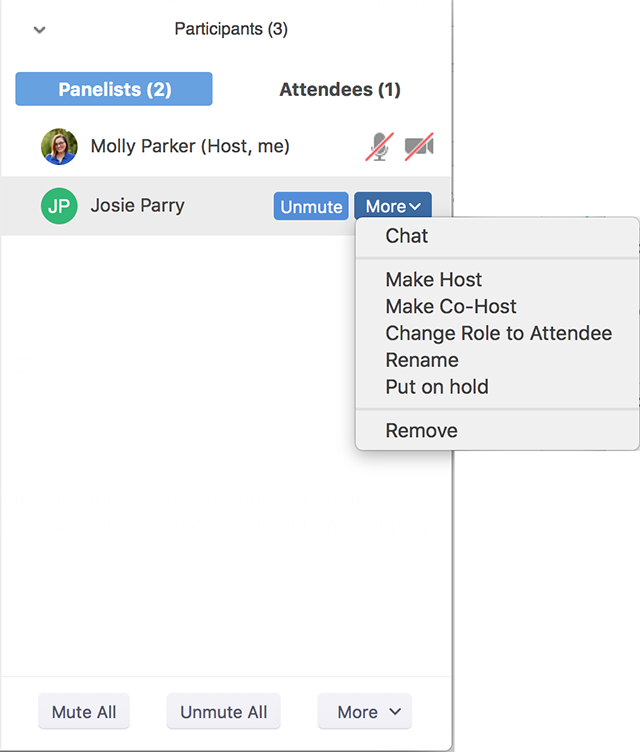
Manage participants
Click Manage Participants button.
This will open the Participants window on the right side of your screen. The host, cohosts and panelists will be listed in one tab and the attendees will be listed in another. To Manage Panelists, hover over the panelist's name.
End Meeting
- Click red End Meeting button on the bottom controls.
- ⚠️ Choose End Meeting for ALL instead of close the app or leave meeting.

Other
Accessing Recording Files
By default, all recordings will be placed in a Zoom folder found in the following file path on these devices:
- PC: C:\Users\User Name\Documents\Zoom
- Mac: /Users/User Name/Documents/Zoom
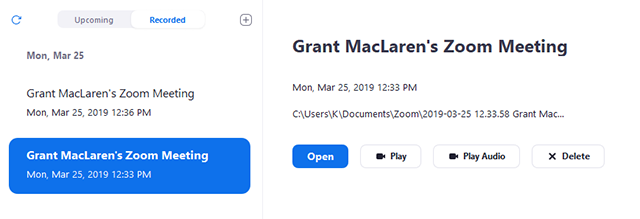
To access recording files:
Open the Zoom desktop client and click Meetings.

Click the Recorded tab and select the meeting with a local recording.
Note :
- If you have a local recording that hasn't been converted to a video file yet, click Convert to convert the recording to a video file and display the options below.
You can access these options to manage your local recordings:
- Open: Open the folder that contains the recording files.
- Play Video: Play the recorded meeting using your computer's default media player.
- Play Audio: Play the recorded meeting audio with your computer's default media player.
- Delete: Remove the meeting from the recording list on the Zoom client. This does not delete it from the computer.
- Refresh icon
 : Refresh the recording list if you don't see your recording.
Note: If there are issues opening or playing the file, check the default recording location and ensure the files are in the correct place.
Share a ppt
when you share a ppt, remember to maximize the ppt by click the Button  or Press F5 in your keyboard.
More
If you want to explore more features, here are some articles, but it's not necessary.