Zhumu Tutorials

1. DIO
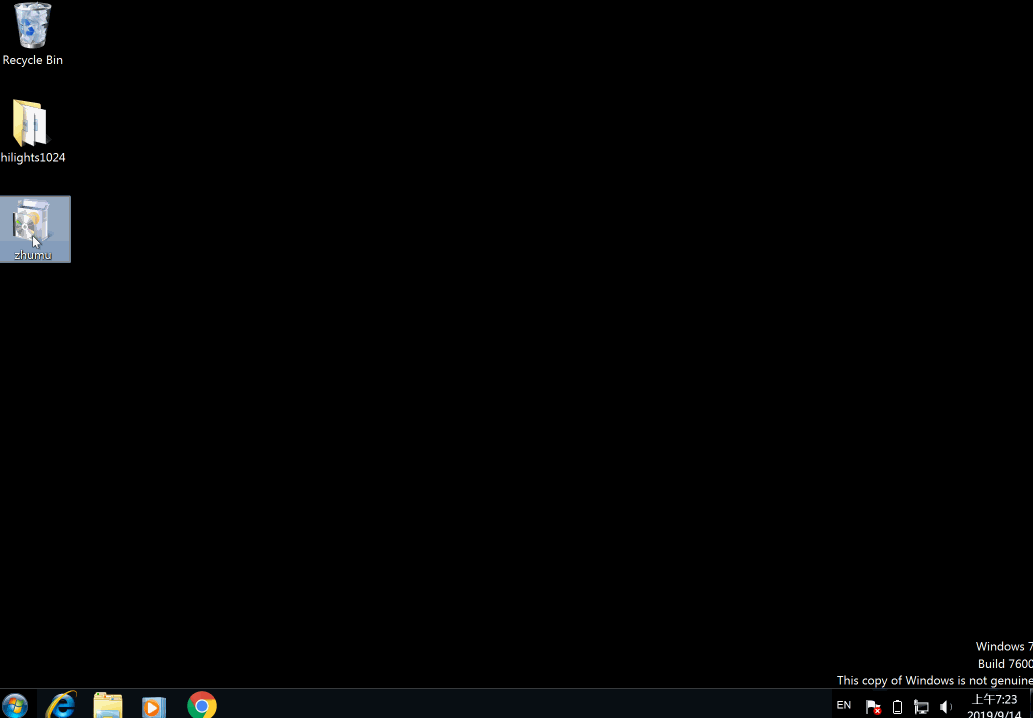
1.1 Download
Download Link
- Windows 7, 8, 10 : https://url.zhumu.me/f12e
- if you use Windows XP use this link to download plz
- Mac
1.2 Install
Double click the downloaded file: zhume.exe or zhumu_xp.exe to install it.
1.3 Open
After install, It will automatically open or you can open it by double click the logo on your desktop, here you go!
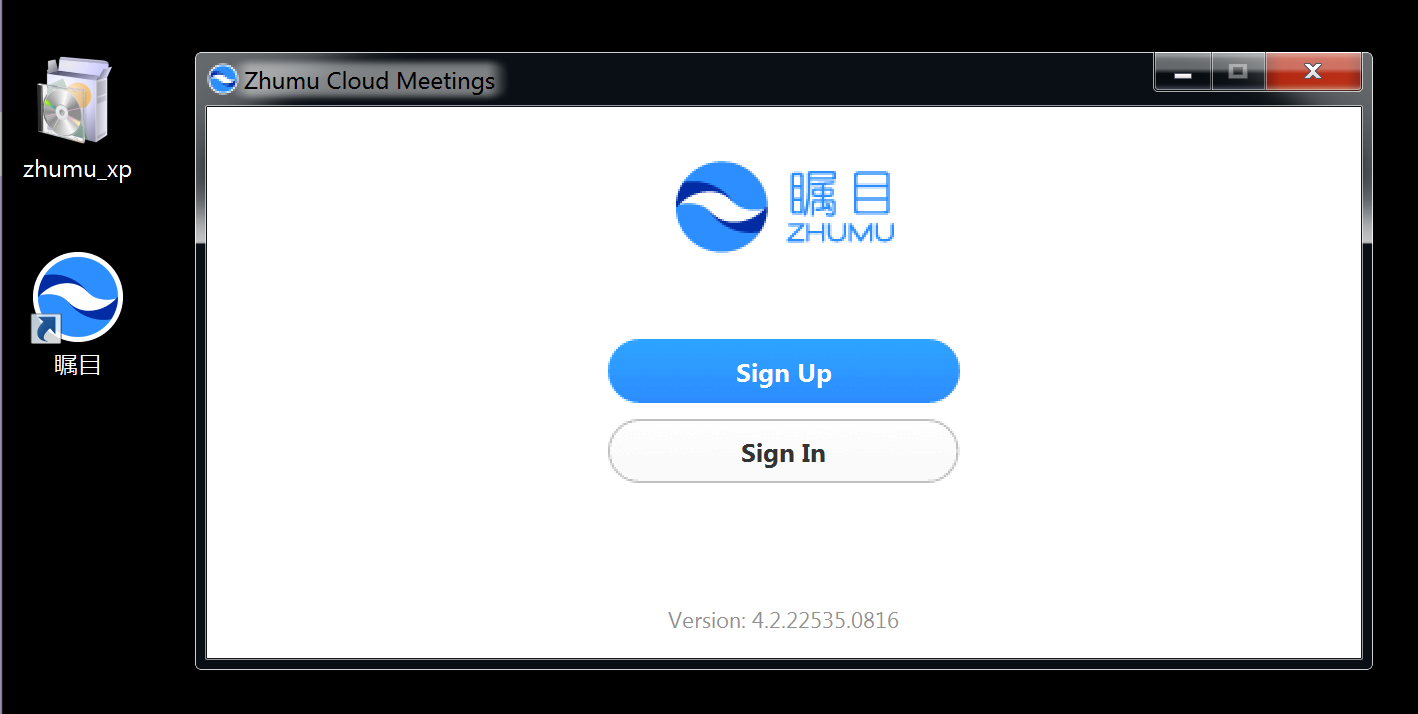
Don't click the "Sign Up" button before you check next step.
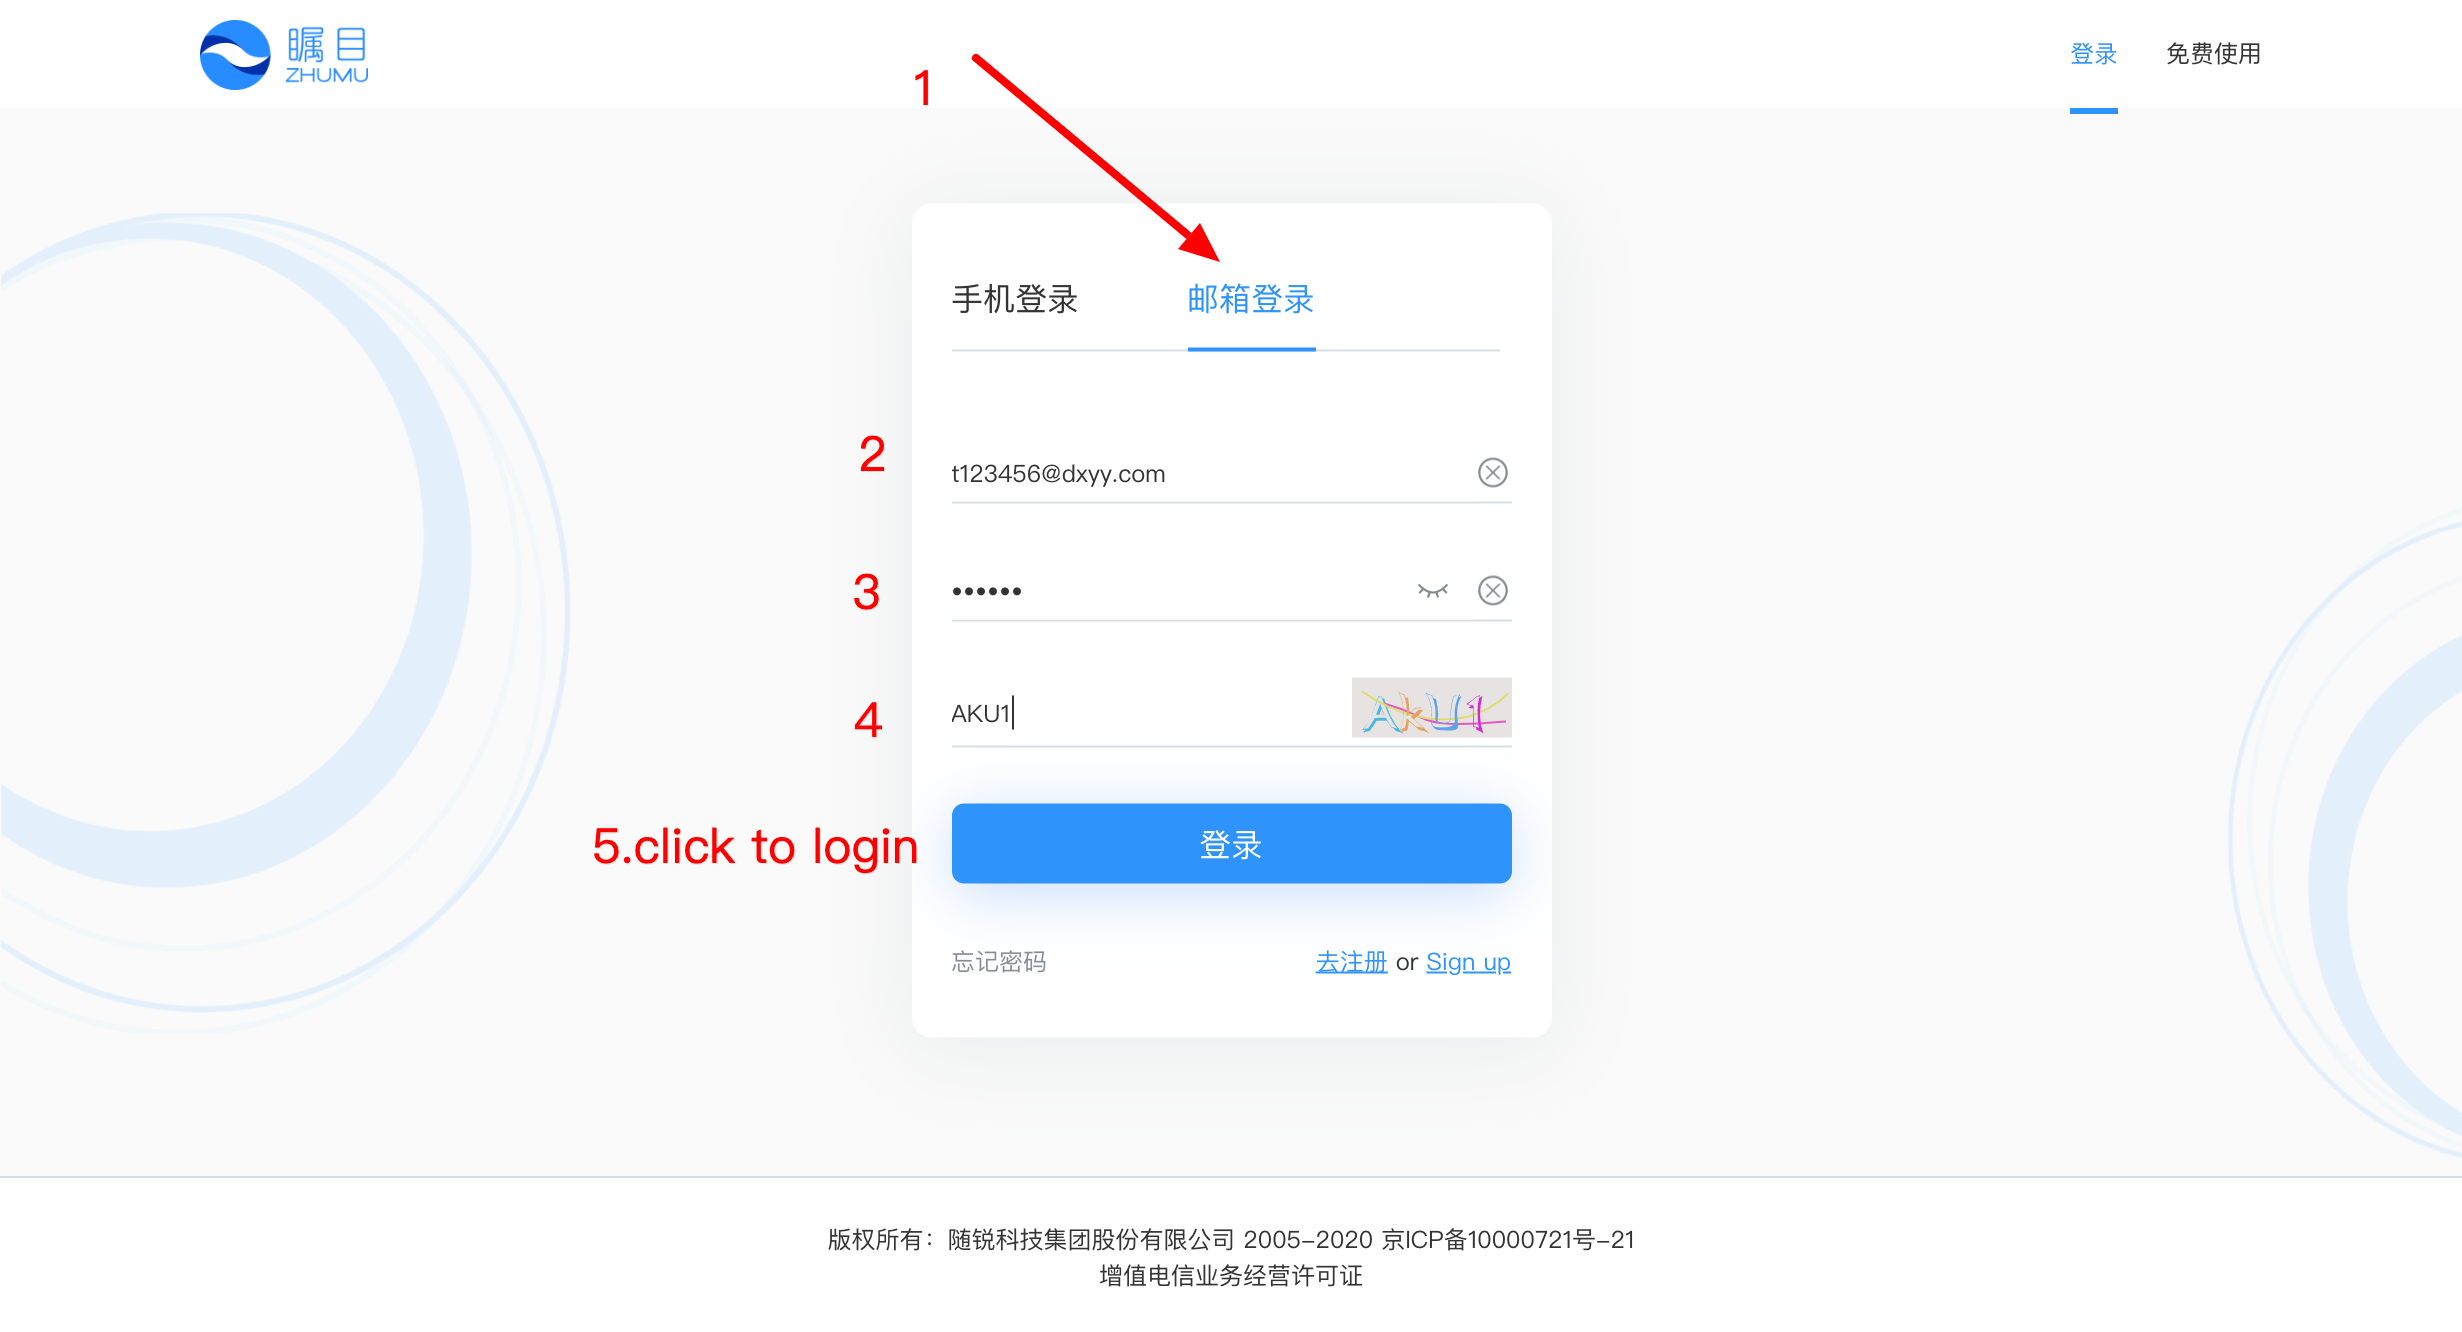
4. Sign In Zhumu Client
Click Sign In button, then input your Email and password your get from Teacher IT

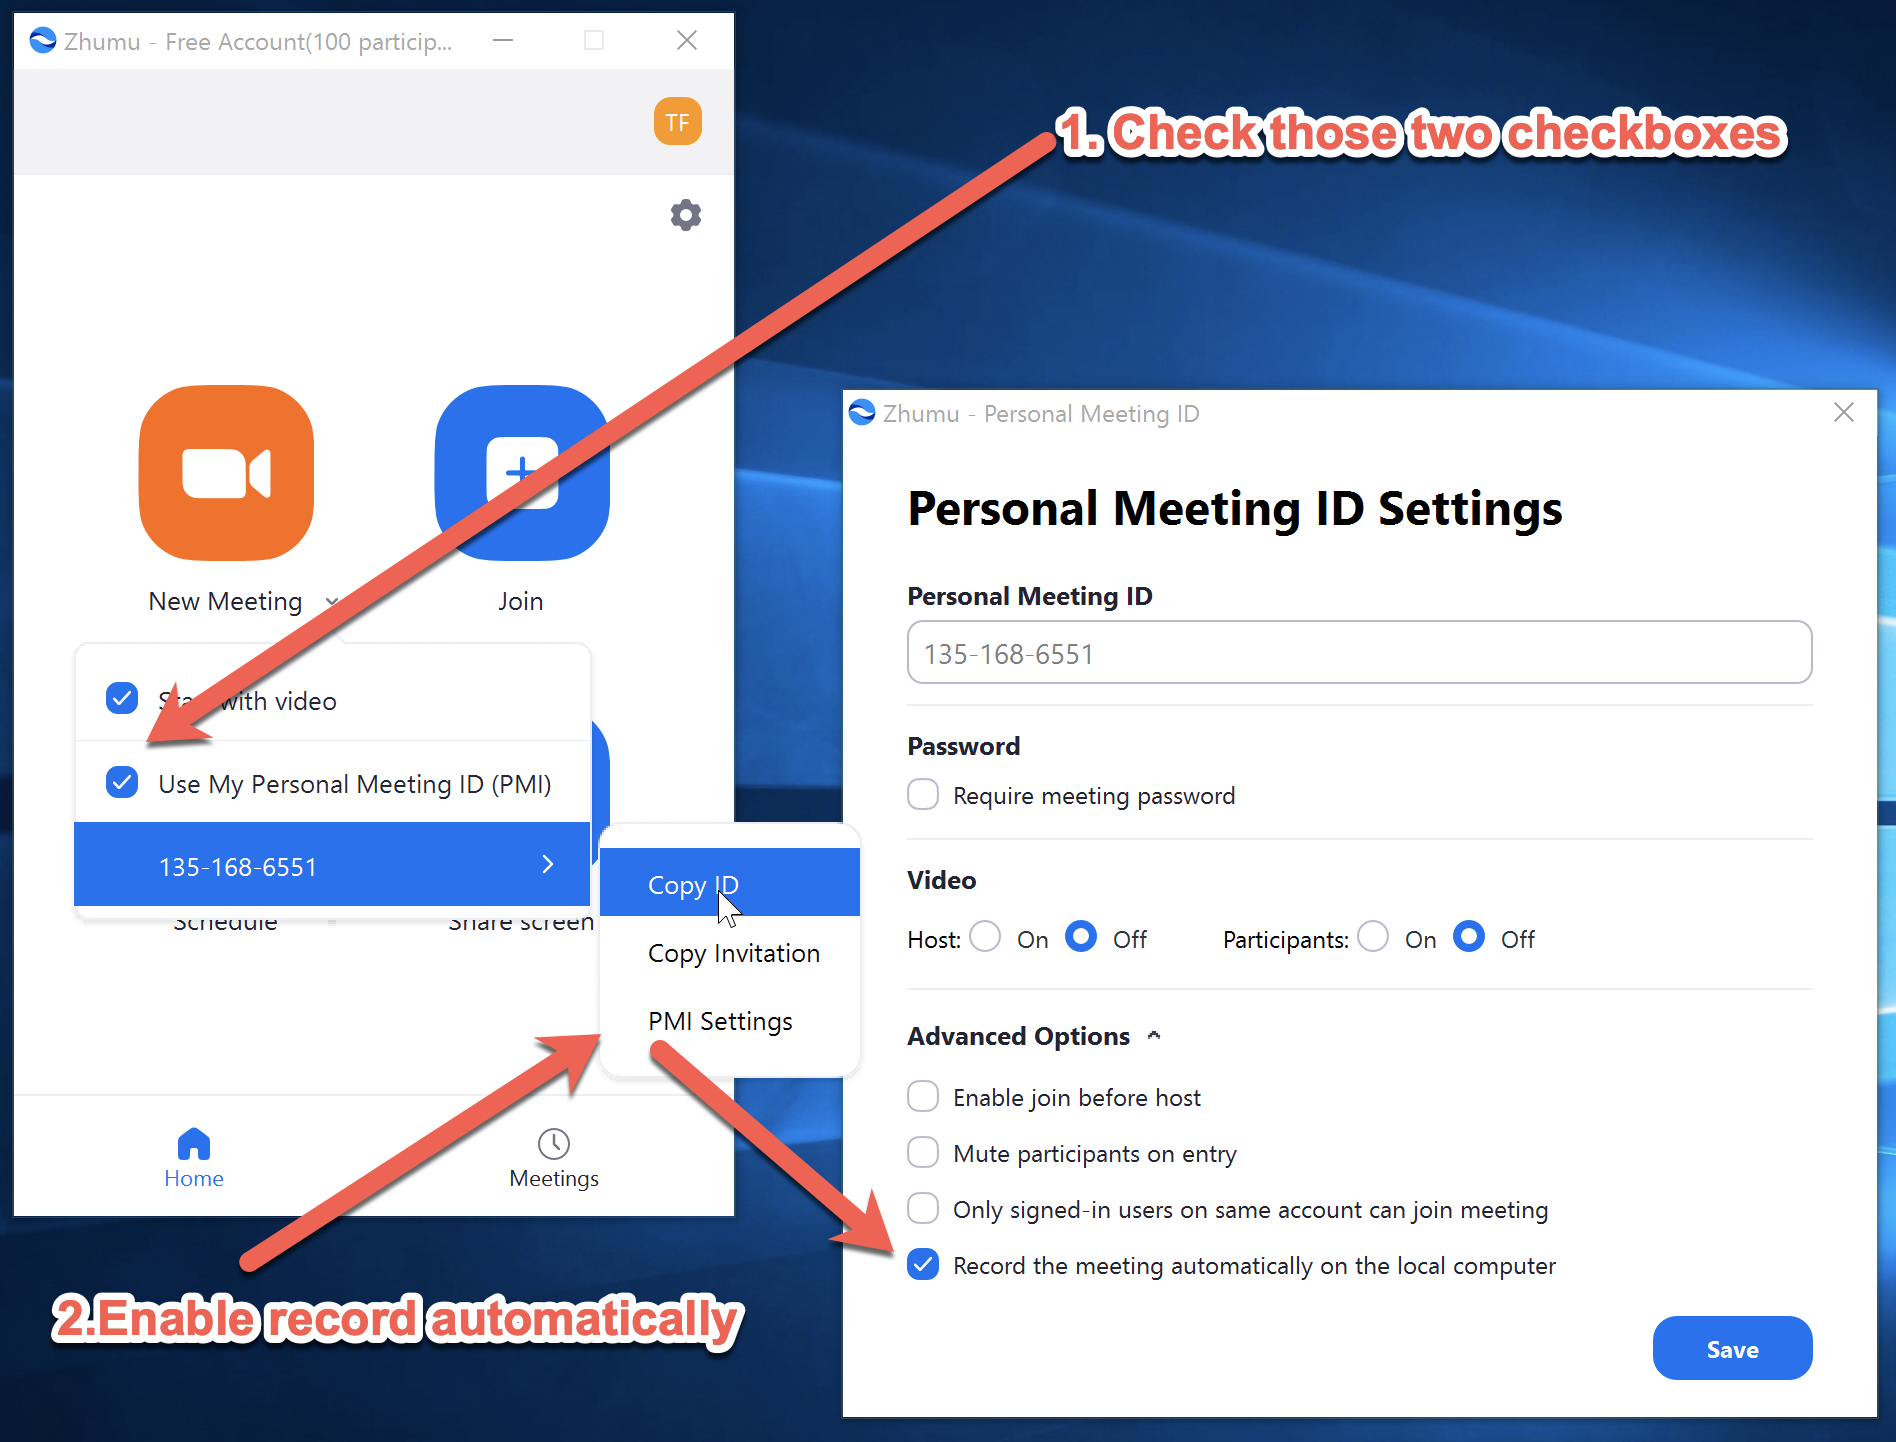
5. Setting PMI *
Click the Meetings button on the bottom besides Home,
Then Click Always use PMI for instant meetings on this computer
Make sure it's checked and send screenshot to IT Support!
6. Meeting control
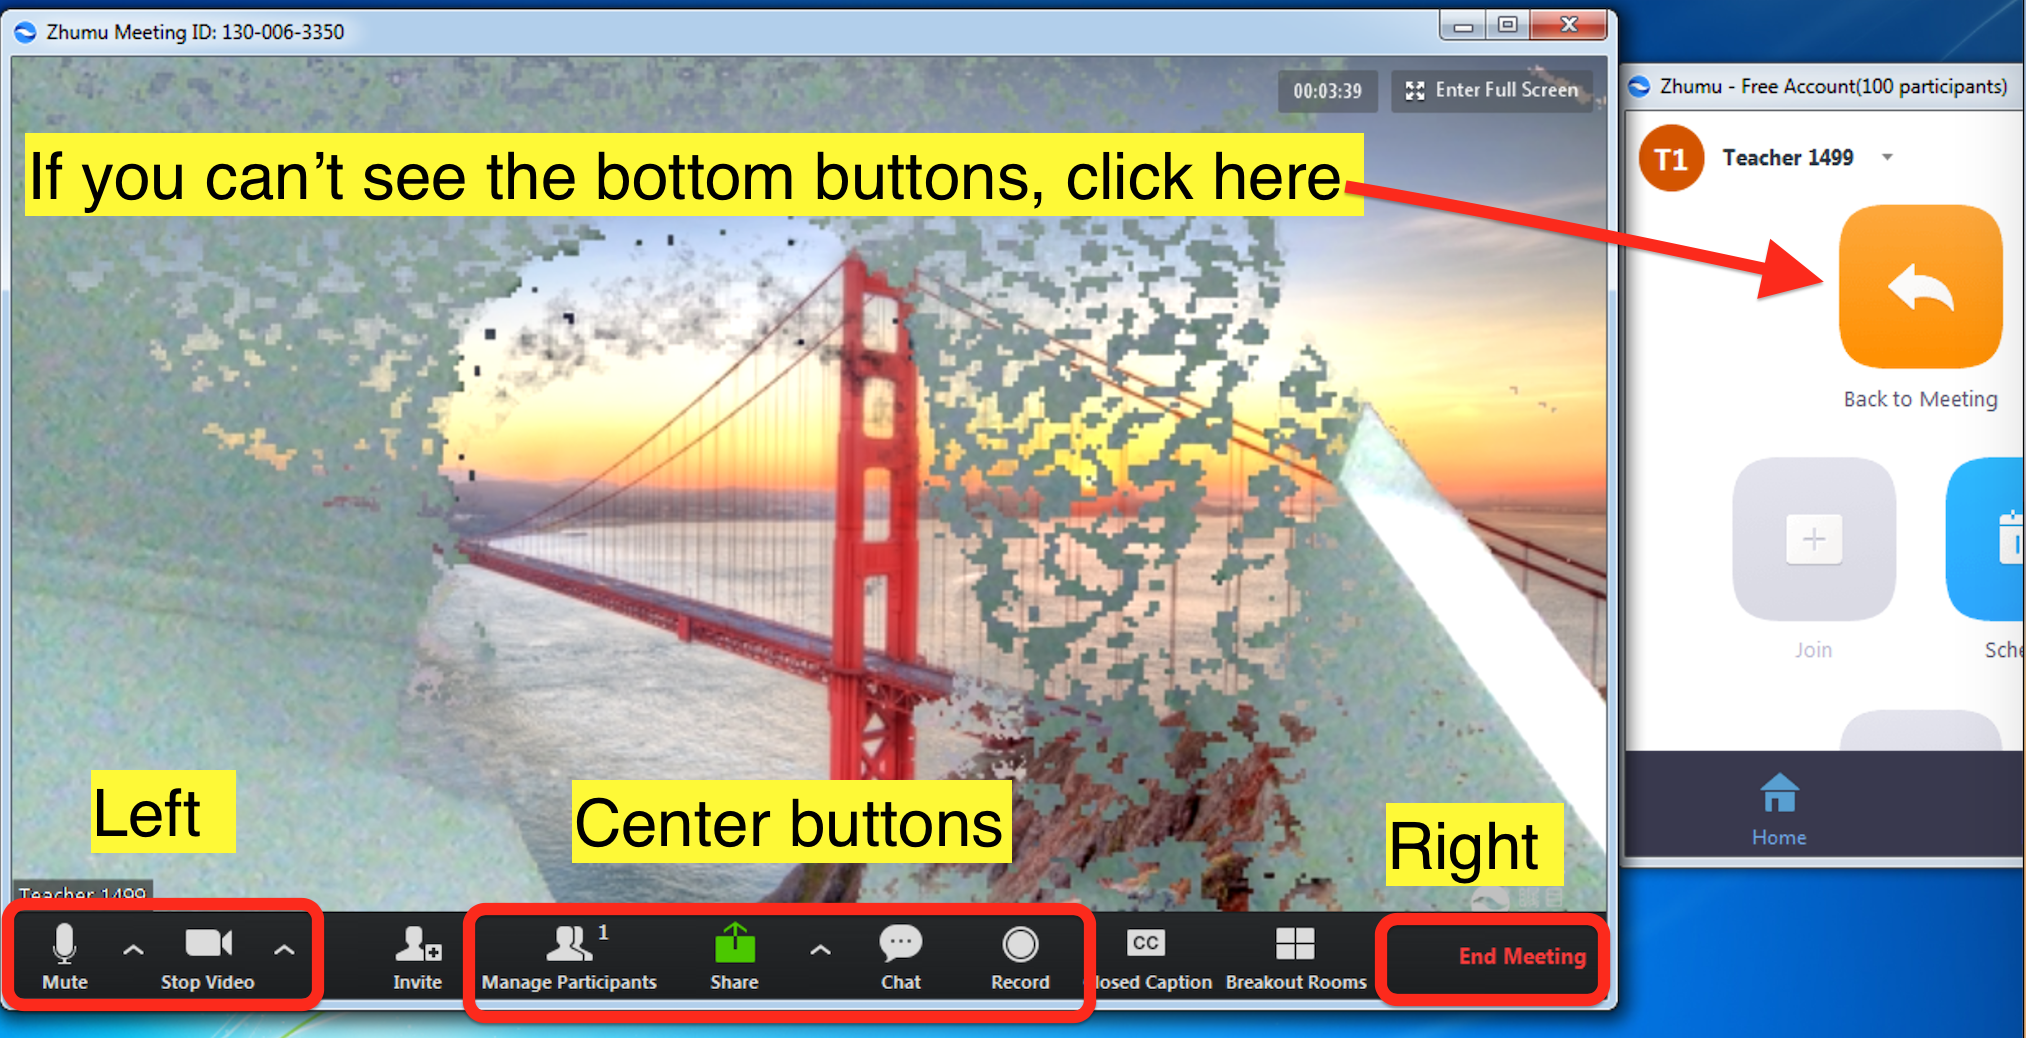
6.1 New meeting
New meeting with your own PMI by clicking Start with Video.
Double check if you have selected your PMI 
6.2 Record
Click the Record button on the bottom,

then you'll see recording on the left top.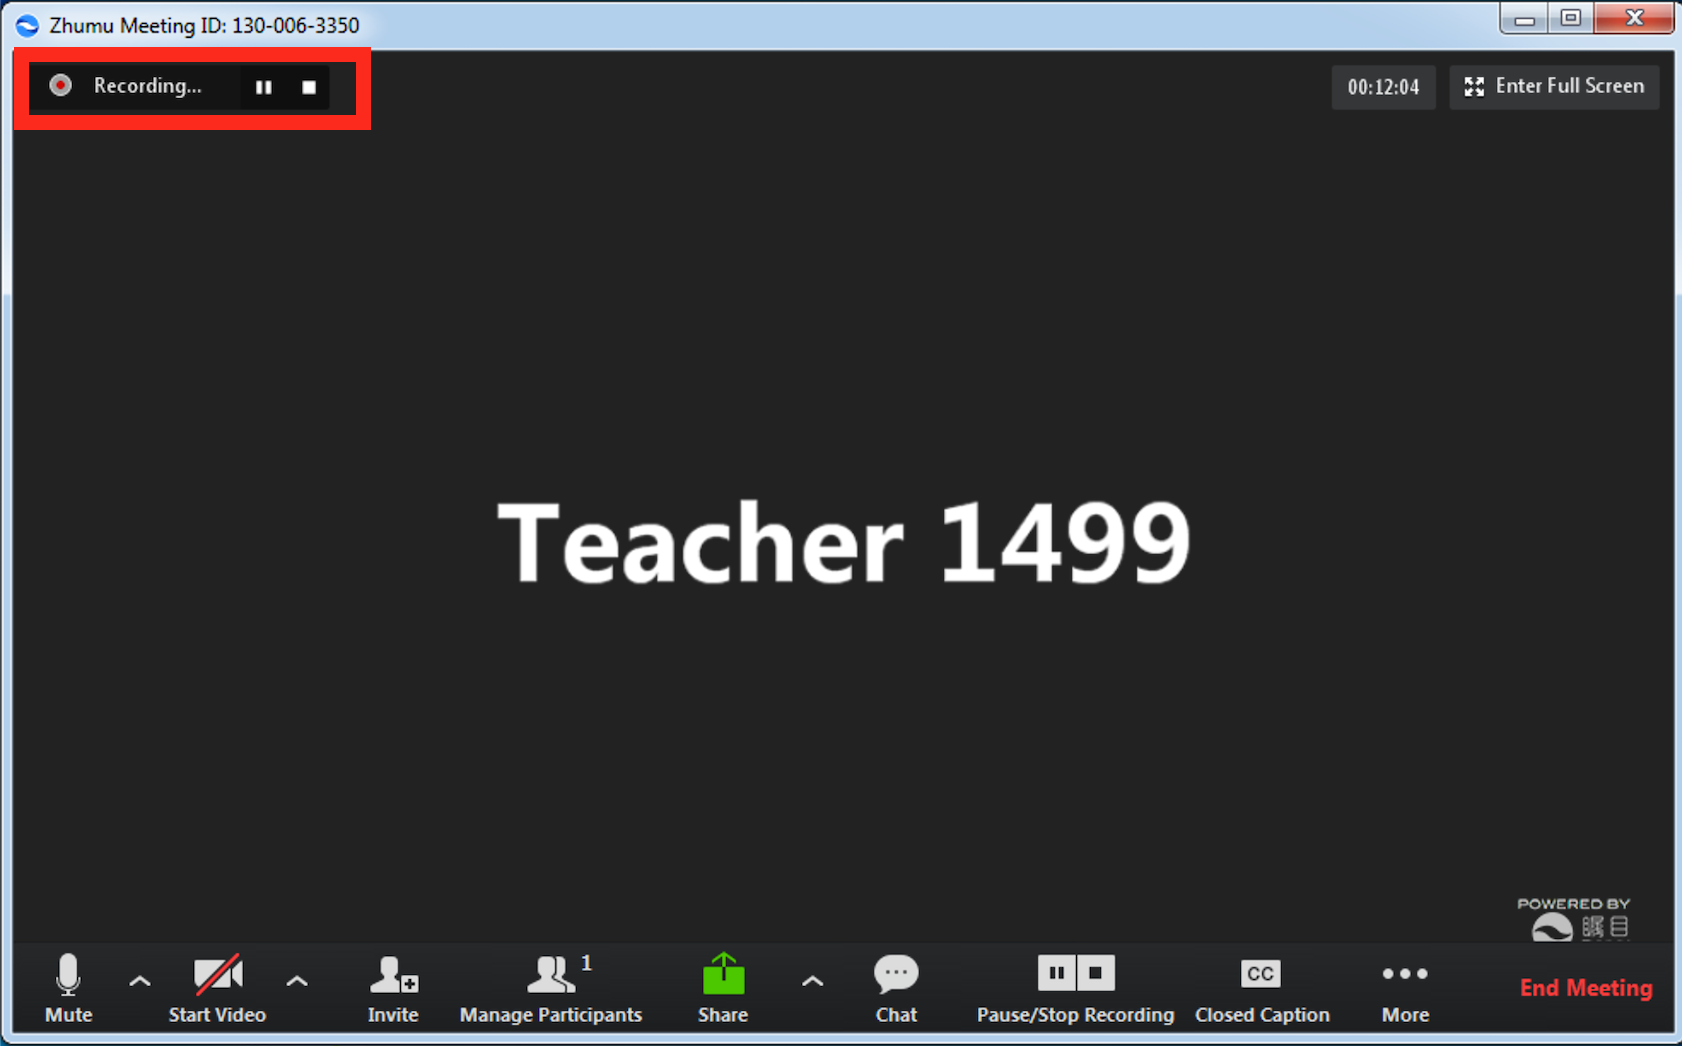
6.3 Chat
Click Chat button.

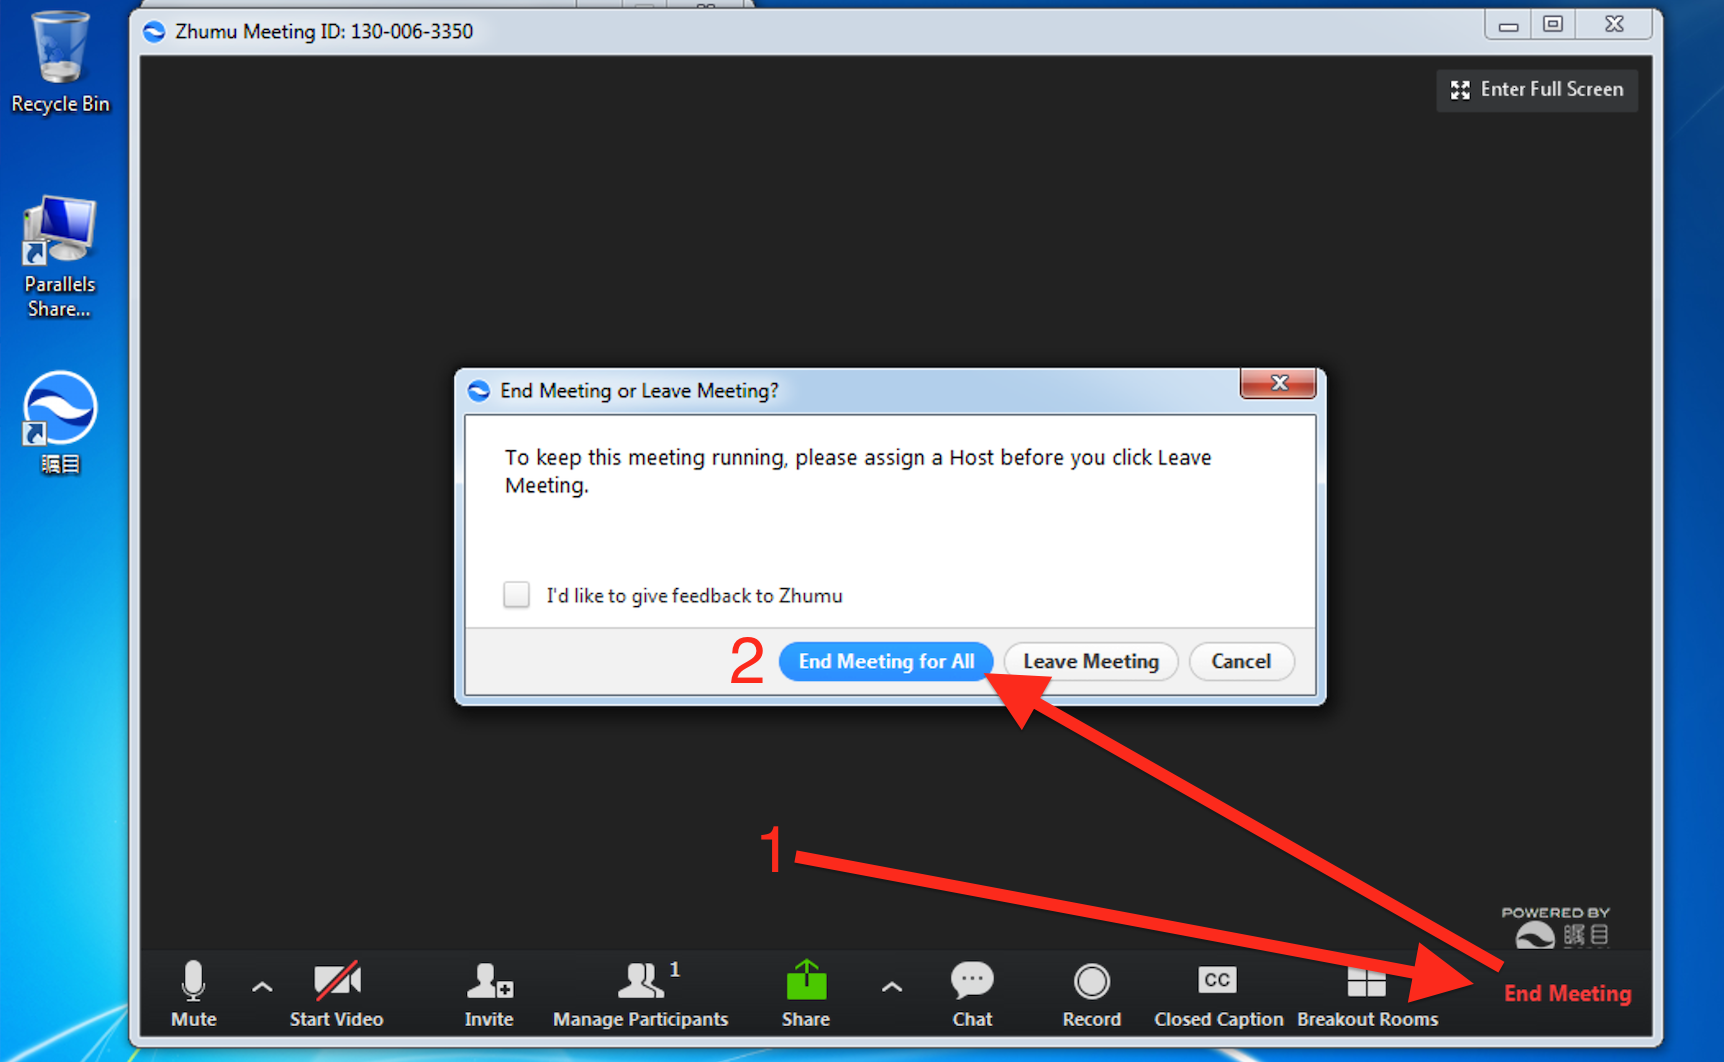
6.4 End meeting *
End meeting in the right way Click the red text besides Record button, then choose End Meeting for ALL
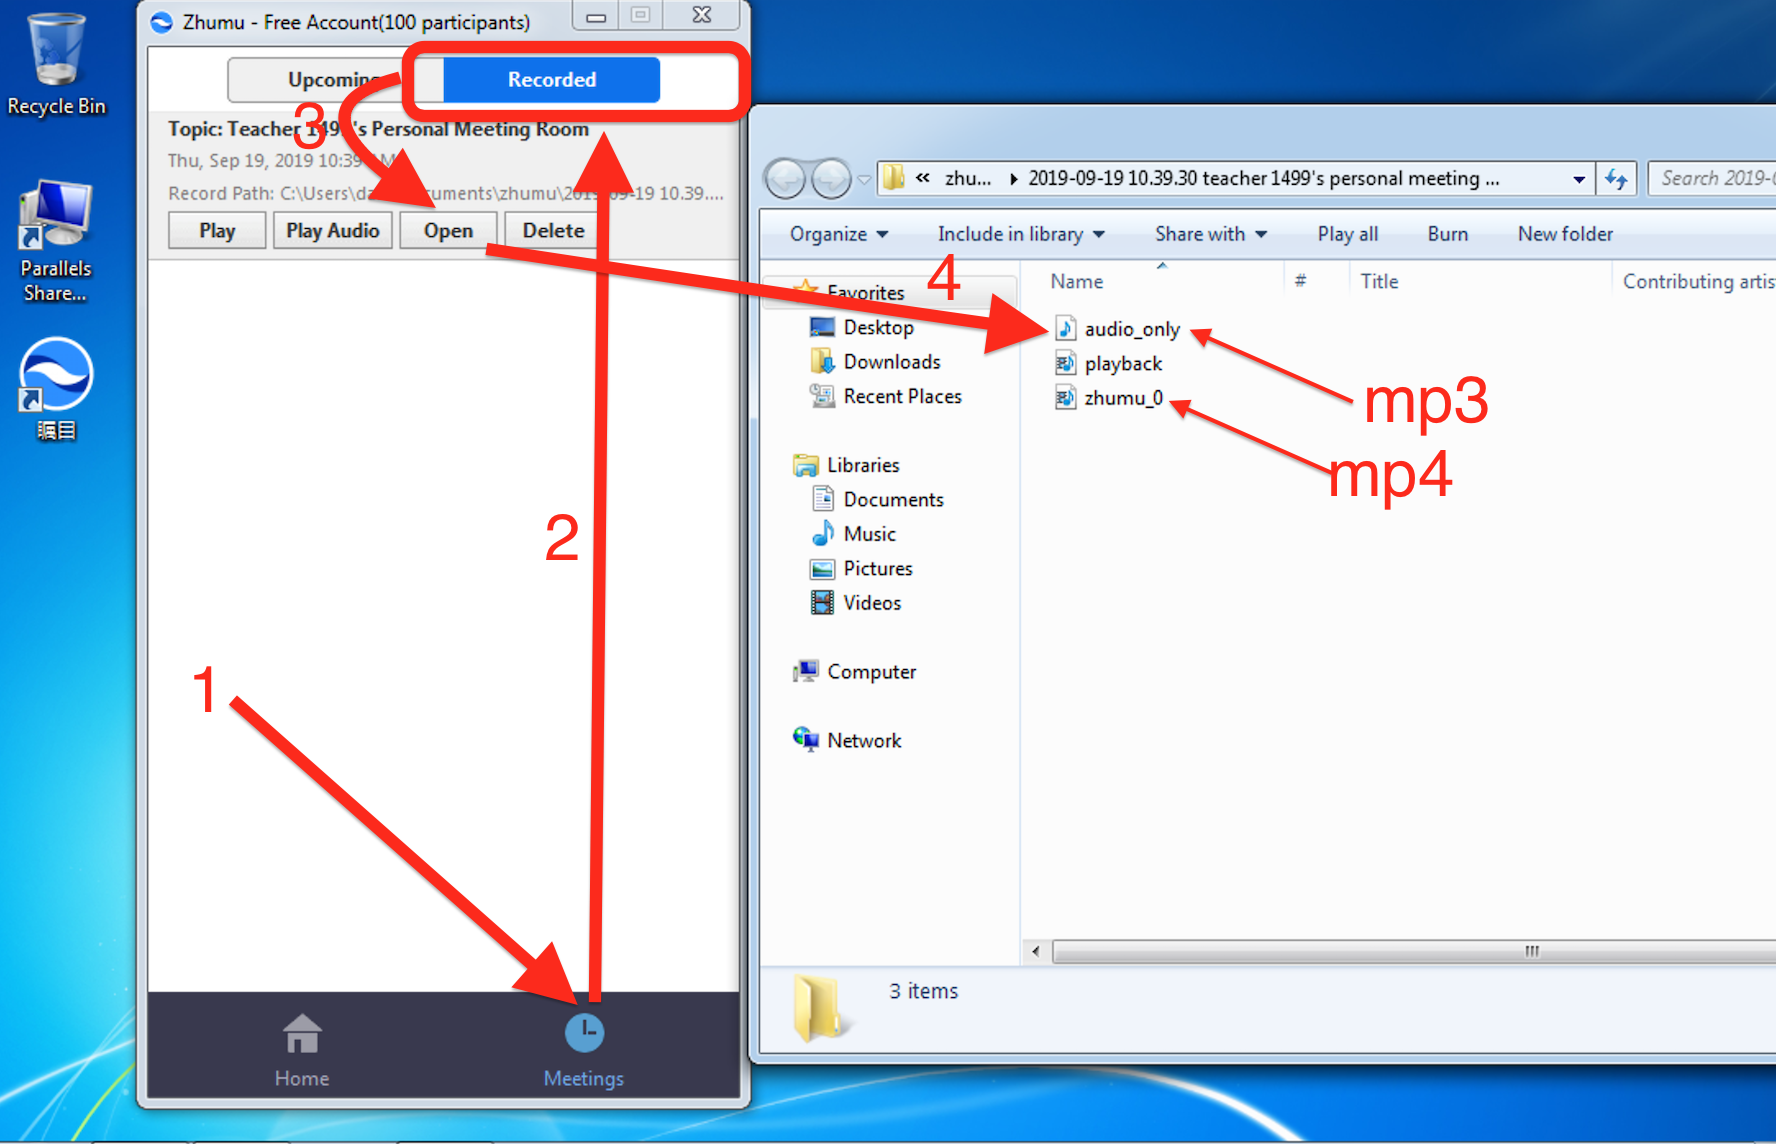
6.5 Accessing Recording Files
Find the Recorded files folder. Click Meetings Besides Home
audio_only(.m4a) is the mp3/audio file.
zhumu_0(.mp4) is the video file.
6.6 Set virtual background *
Click Enable this feature anyway if you see it.

Then choose one of 3 default pictures. if you get a not good effect, you can follow pictures step 2,4,3 of below.
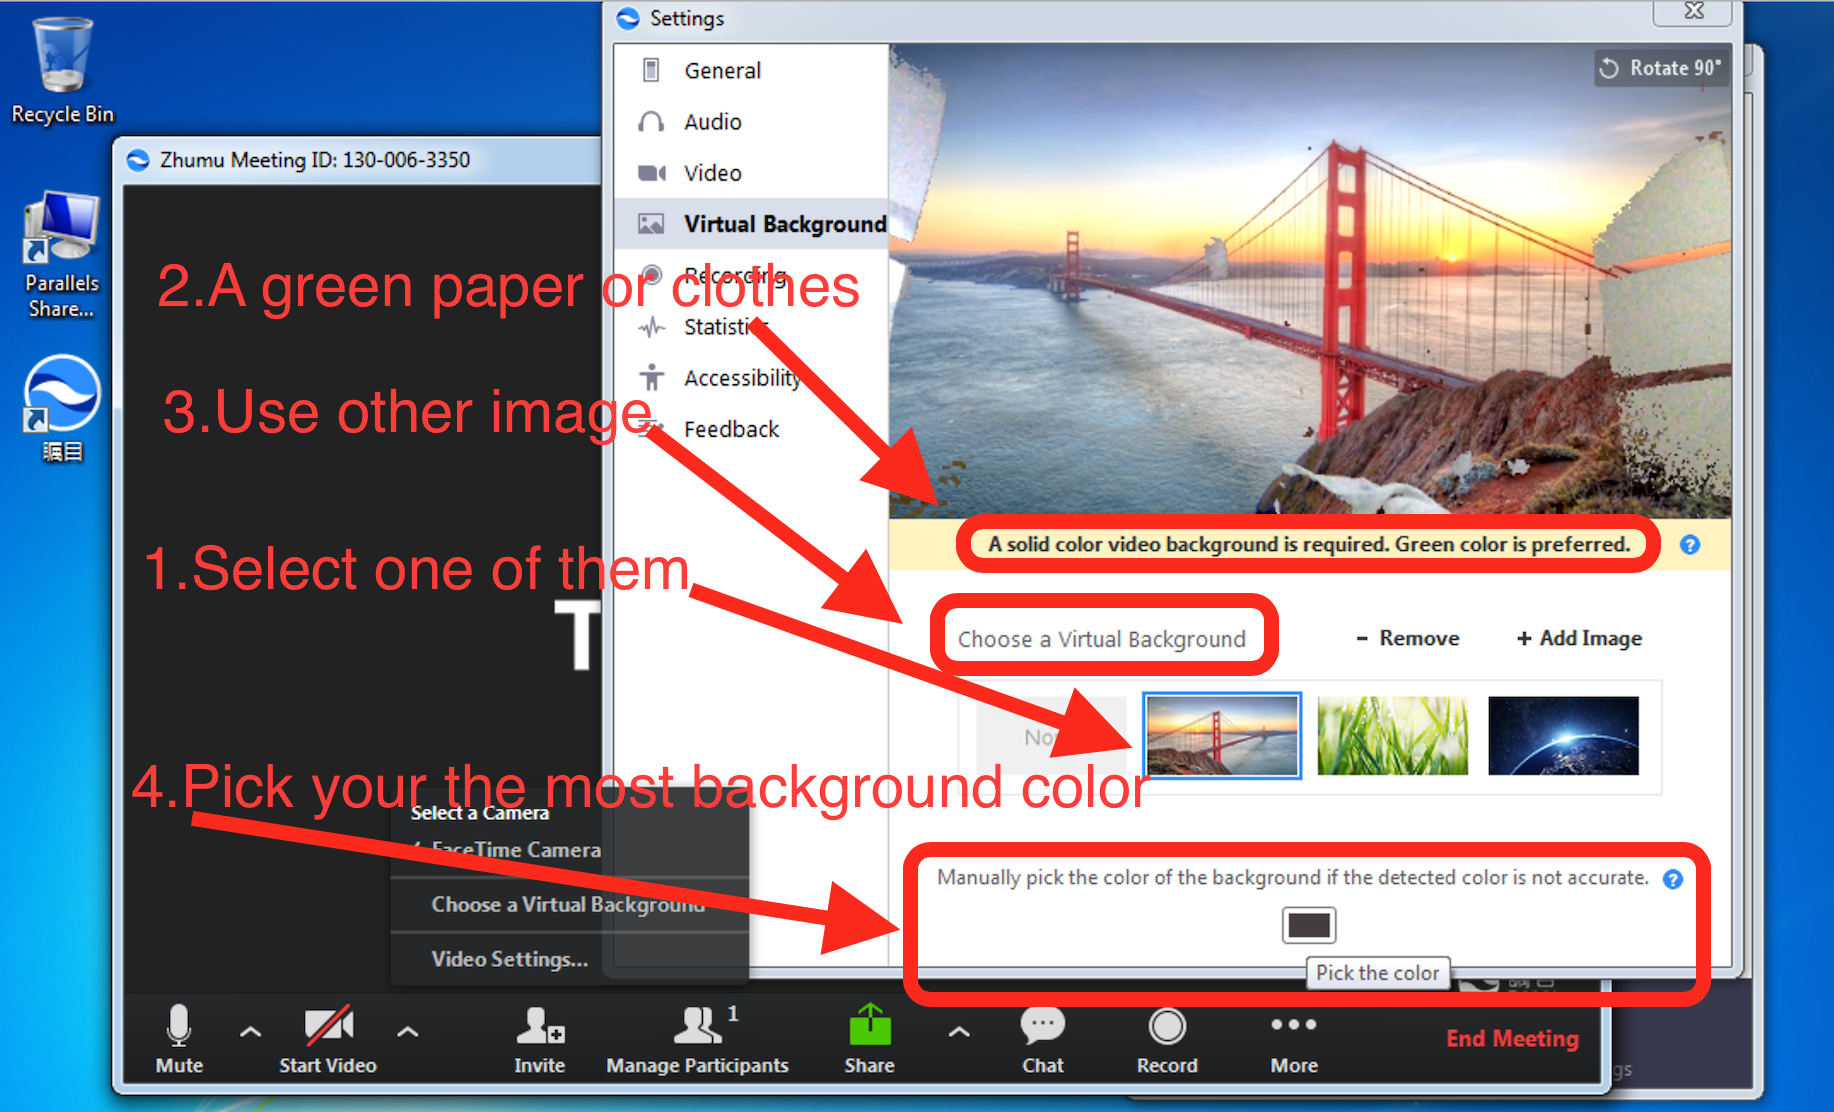
6.7 More background images
You can download more virtual background by follow links.
7. All about share
For share some Application(docs, pdf, mp3/mp4) to your student, you need first open it on your computer.
Then click the Share button in the middle of control. then choose what Application you want to share.
And you can Annotate on any share.
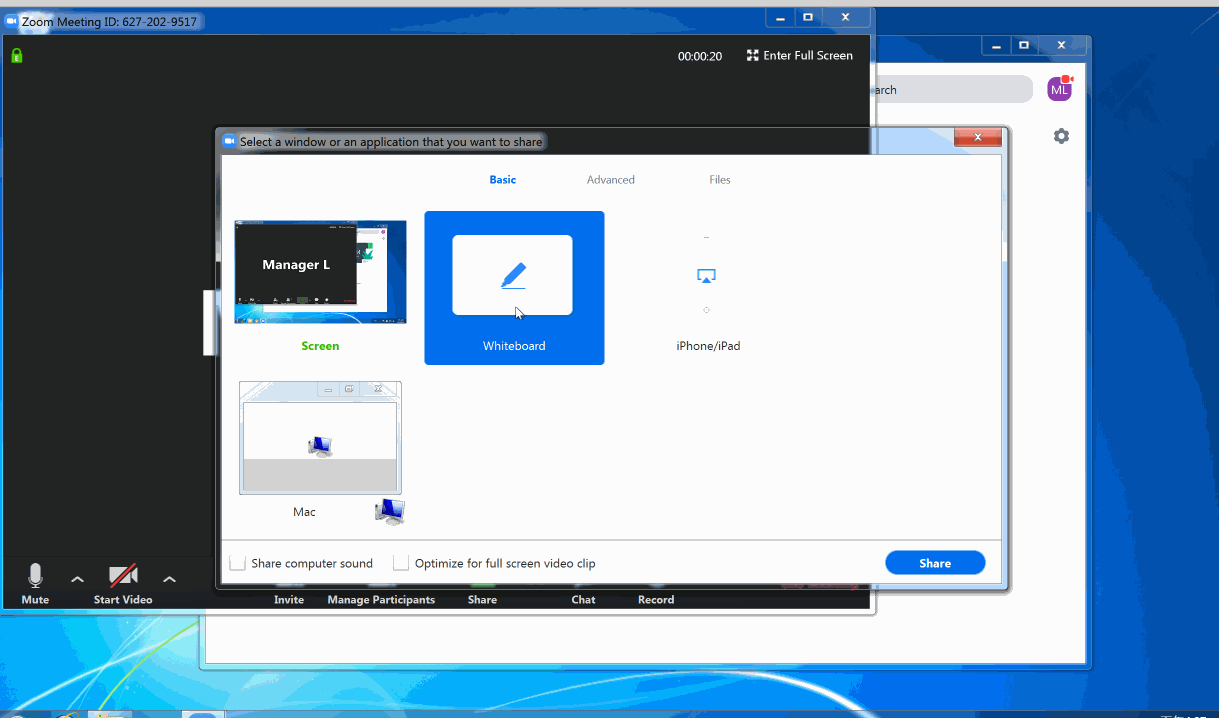
7.1 Share whiteboard
Click Share Screen button, then choose whiteboard.
7.2 Annotate on Share

7.3 Stop a share
Click the red button "Stop Share". If you can't see this buttons group, hover on the top of zoom window.

7.4 Share a ppt
- Open the ppt first, Click Share button, Choose the Mircosoft power point application that opened the ppt, then share.
7.5 Zoom ppt *
When you share a ppt, remember to maximize the ppt by click the Button
 or Press F5 in your keyboard.
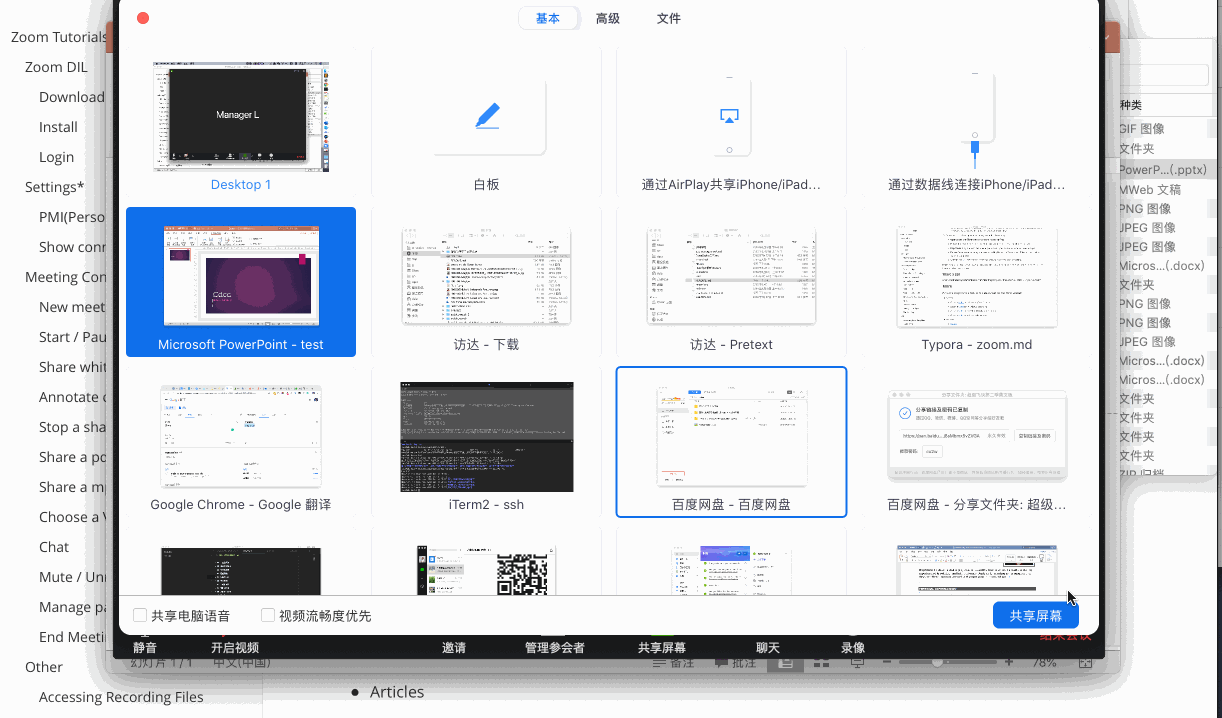
7.6 Annotate on shared ppt
7.7 Share a pdf
- Open the pdf first,
- Click [Share] button,
- Choose the application that opened the pdf,
- Now the student will see your pdf.
- Then you can draw / text like whiteboard.
7.8 Annotate on shared pdf
7.9 Zoom a pdf *
if you use Chrome to open the pdf. you can follow this link: https://support.google.com/chrome/answer/96810?hl=en
Or other pdf viewer application, you can find simlar tools or icons like
7.10 Share a mp4 / mp3
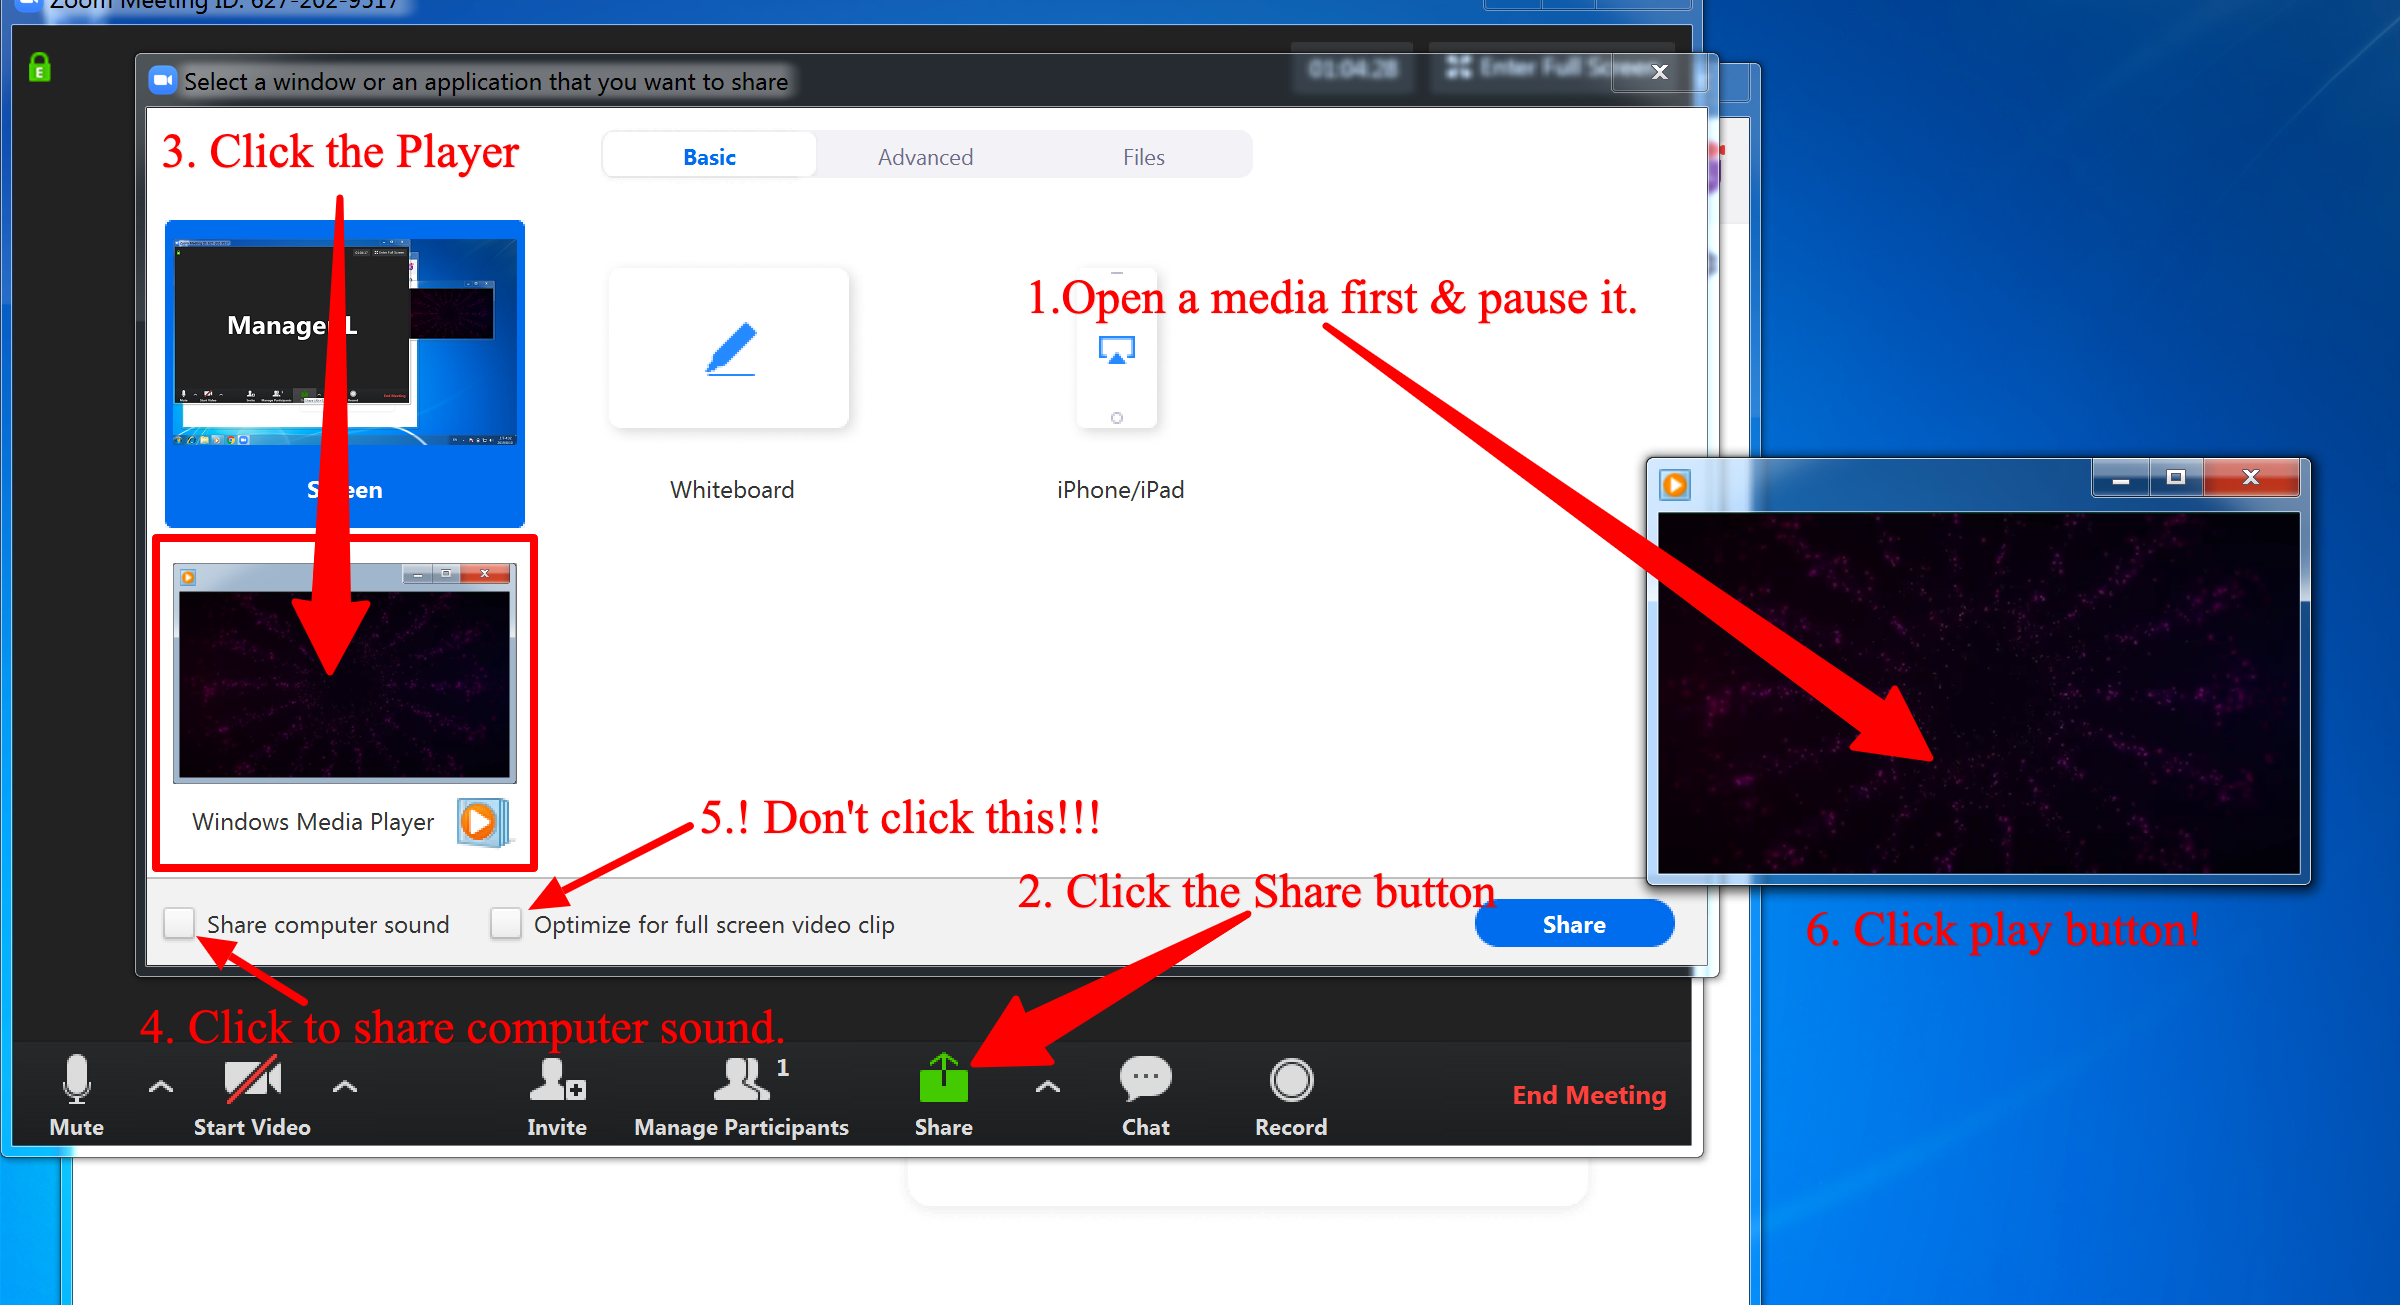
- 1.Open the video/audio first, then pause it.
- 2.Click [Share Screen] button
- 3.Choose the application to share mp4/mp3
- 4.Click the checkbox to Share computer sound **
- 5.unpause your media player.
8. Show connected time
For you need to take a screenshot before the class ends with the indicated time that you called & send it by Skype.
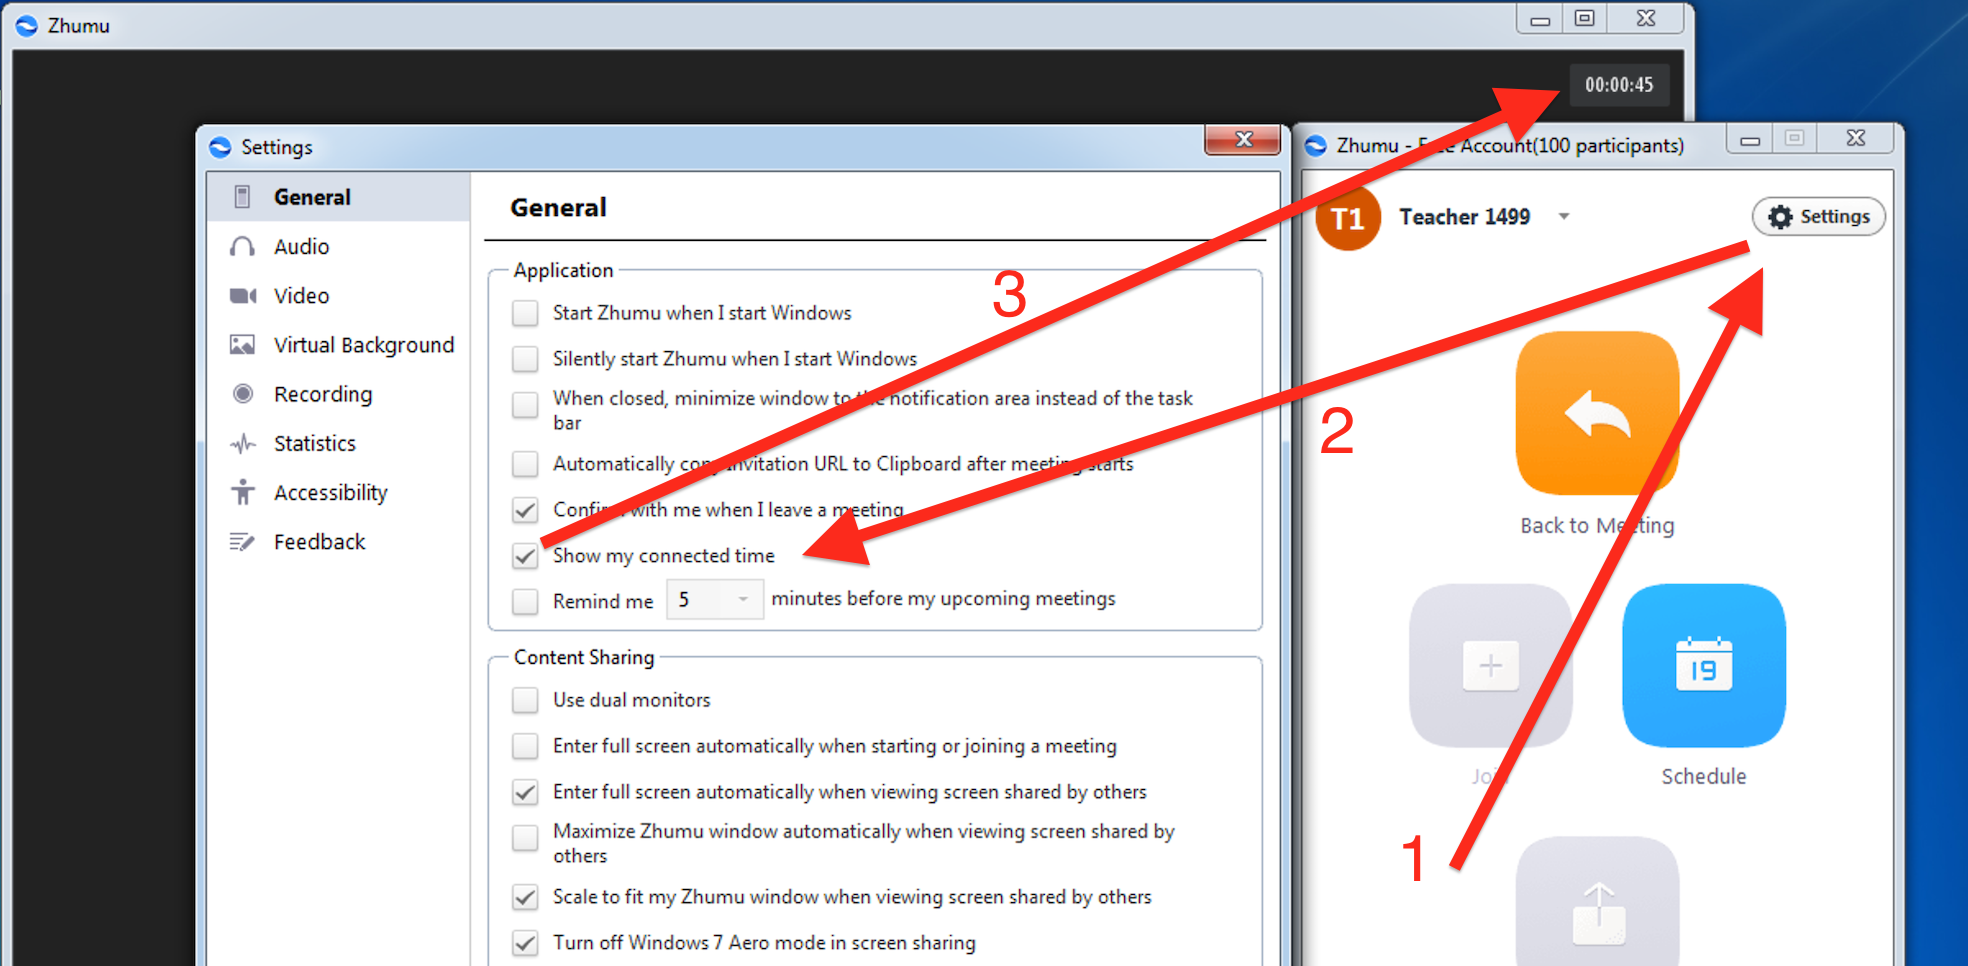
How to take a screenshot? You can read this document.
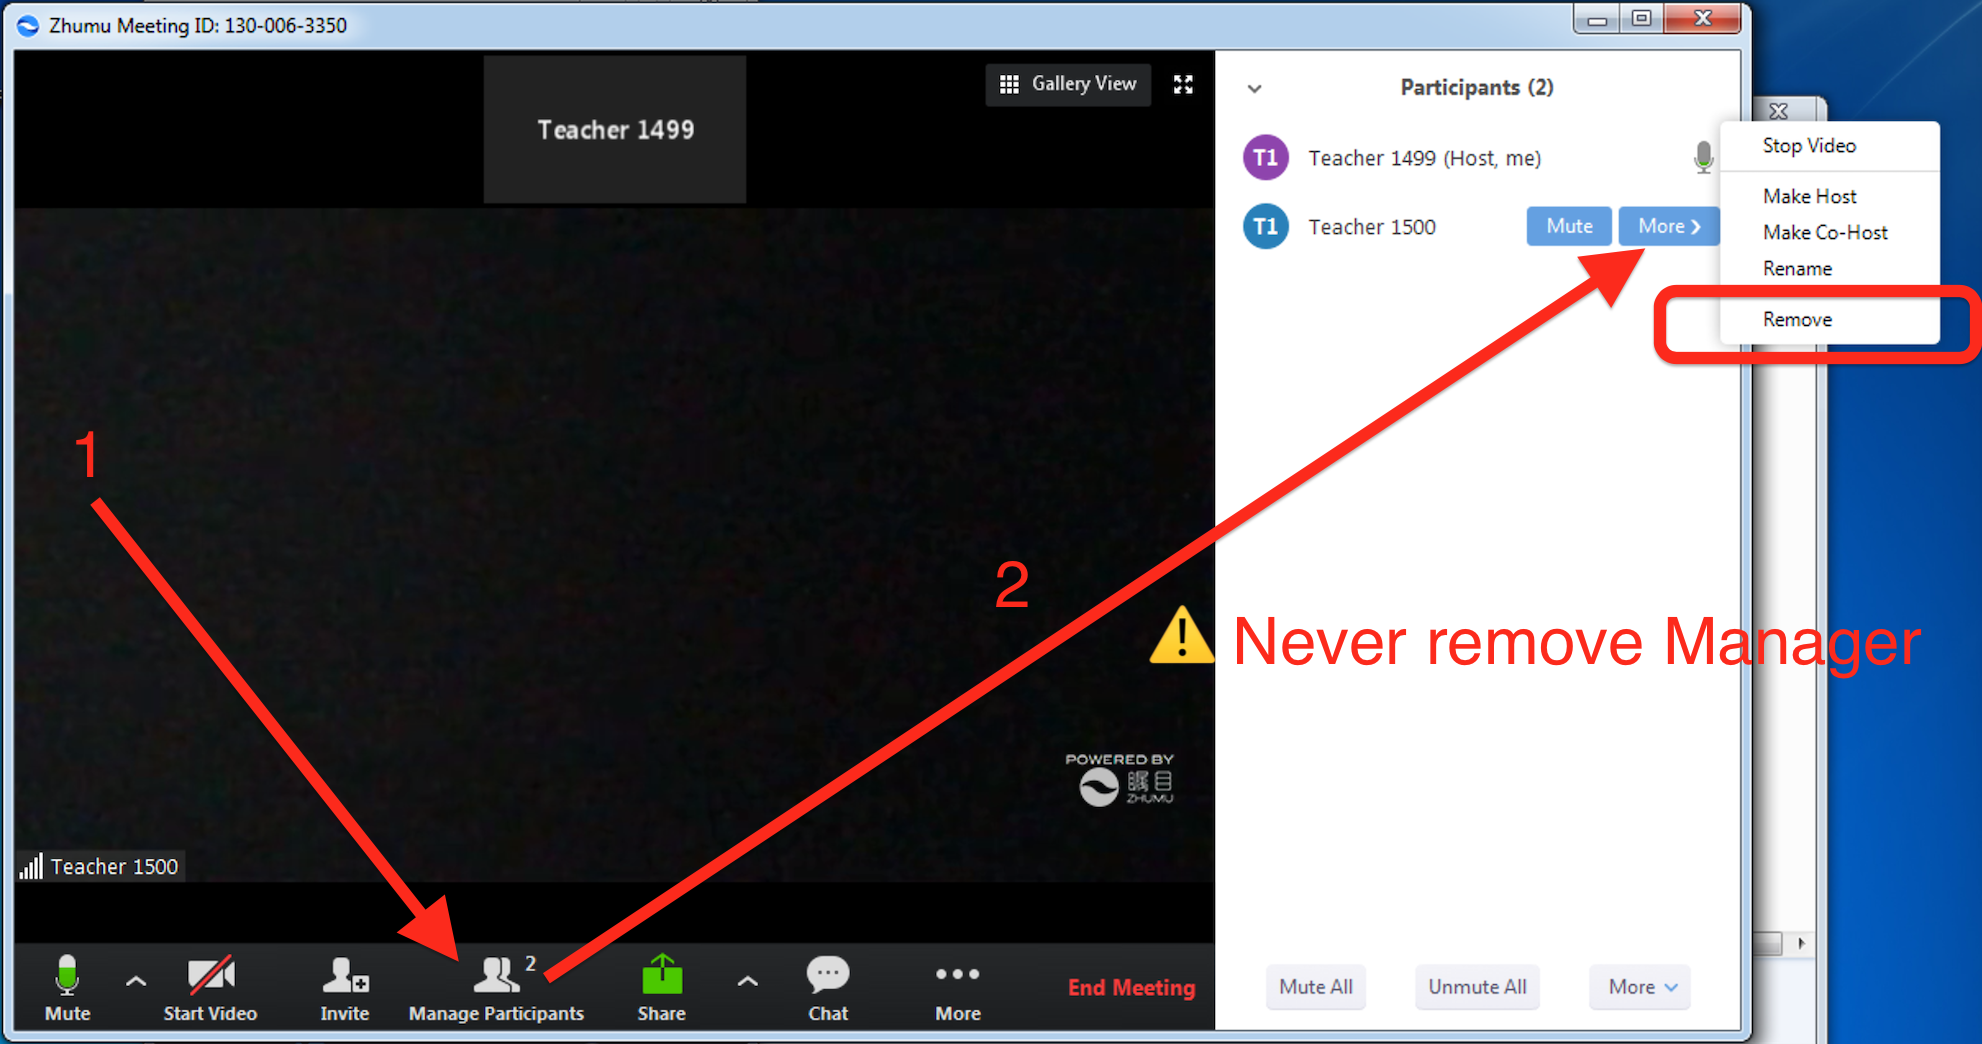
9. Manage participants
How to remove Guest while having class?
- Click Manage Participants button.
- Never remove the Manager !!!

This will open the Participants window on the right side of your screen. The host, cohosts and panelists will be listed in one tab and the attendees will be listed in another. To Manage Panelists, hover over the panelist's name.
10. how to change the avatar
- we'll use the photo in your resume as default avatar
- you can chang it by login https://zhumu.com/users/sign_in